The 4-way Line Following Sensor(EF05053)
Contents
39. The 4-way Line Following Sensor(EF05053)#
39.1. Introduction#
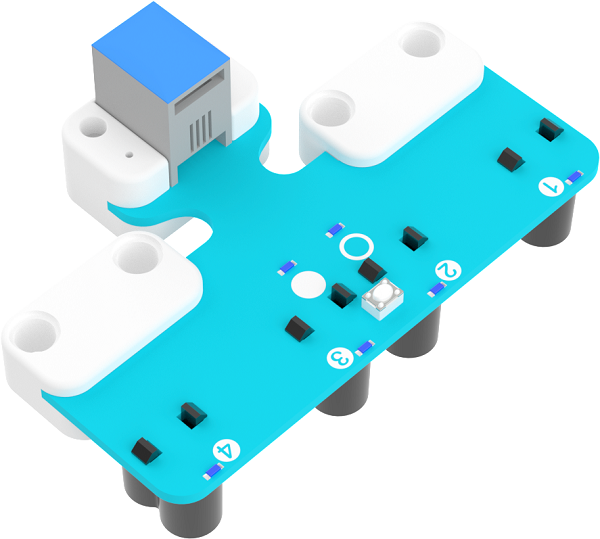
The 4-way line following sensor has integrated 4 groups photocell recevier and the fill light LEDs(We call them all as the Probes). At the mean time, it is able to learn by itselft, which means it could adapt to colors in different gray levels.
39.2. Products Link#
39.3. Characteristics#
RJ11 connections, easy to plug.
39.4. Specification#
| Item | Parameter |
|---|---|
| SKU | EF05053 |
| Connection | RJ11 |
| Connection Type | IIC |
| Working Voltage | 3.3V |
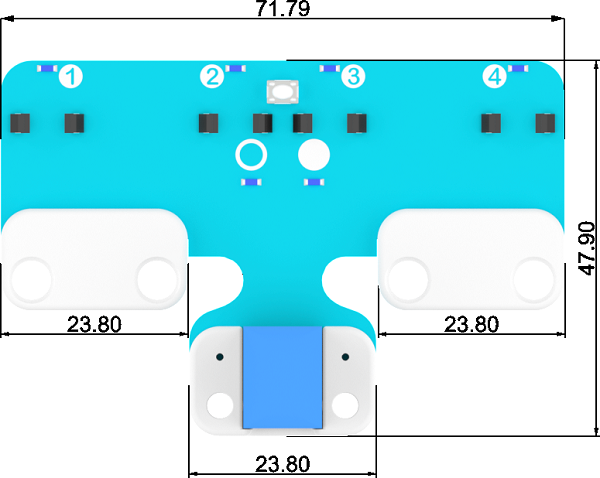
| Dimension | 71.79 x 47.9 mm |
| Valid Scope | 8~16 mm |
39.5. Outlook and Dimensions#
39.6. Quick Start#
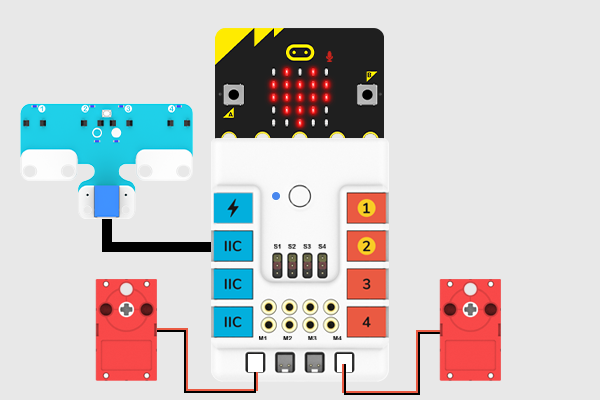
39.6.1. Connection Diagram#
Connect the 4 way line following sensor with the IIC port and the two motors to M1 and M4 on Nezha board.
39.6.2. The Learn Mode#
Press the learn button to learn the map background and the line following path(the black track ). Follow with the following procedures to complete the learn:
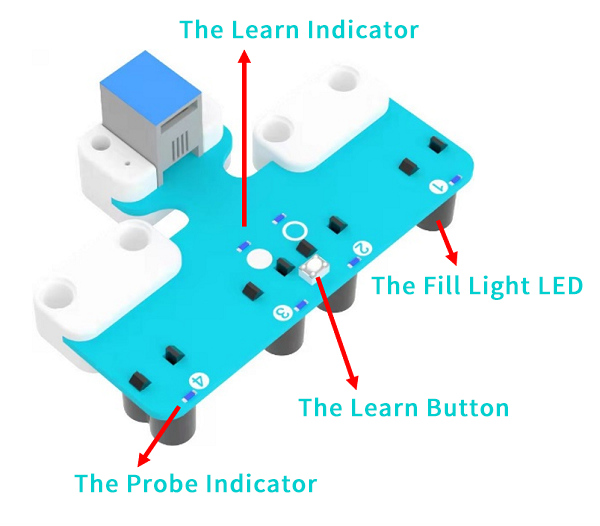
①Face the probe to the background part of the maps and press the learn button.
②The 4 probes indicators light on in turn and the 2 learn indicators flash alternately.
③If the fill light flahes in a high frequency with the colorful light, the line-following probe should be moved horizontally back and forth on the background map and the line-following track.
④Keep moving back and forth until the fill light of the line probe stops flashing, and the learning is completed.
Note: The height of the line tracking probe from the ground should be among 8mm and 16mm.
After the learning, the two learn indicators will be off. When the probe detects the track, the corresponding probe indicator light will be on. When the learn fails, the hollow circle and solid circle LEDs flash rapidly at the same time, and the fill light RGB light goes out.
39.7. MakeCode Programming#
39.7.1. Step 1#
Click “Advanced” in the MakeCode to see more choices.
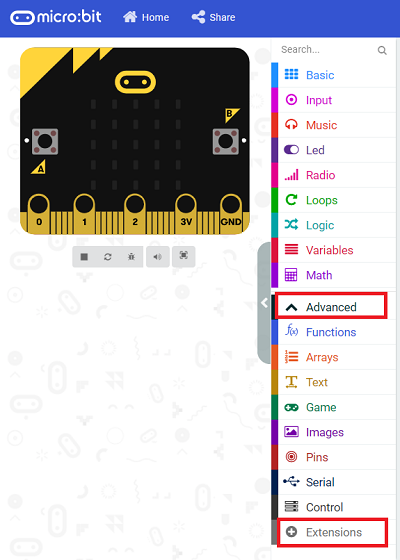
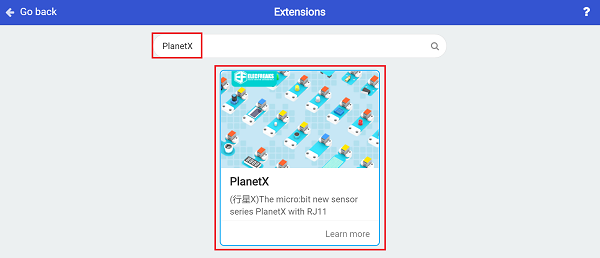
For programming, we need to add a package: click “Extensions” at the bottom of the MakeCode drawer and search with “PlanetX” in the dialogue box to download it.
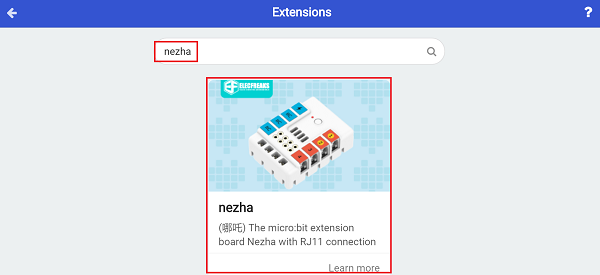
For programming, we need to add a package: click “Extensions” at the bottom of the MakeCode drawer and search with “nezha” in the dialogue box to download it.
Notice: If you met a tip indicating that some codebases would be deleted due to incompatibility, you may continue as the tips say or create a new project in the menu.
39.7.2. Step 2#
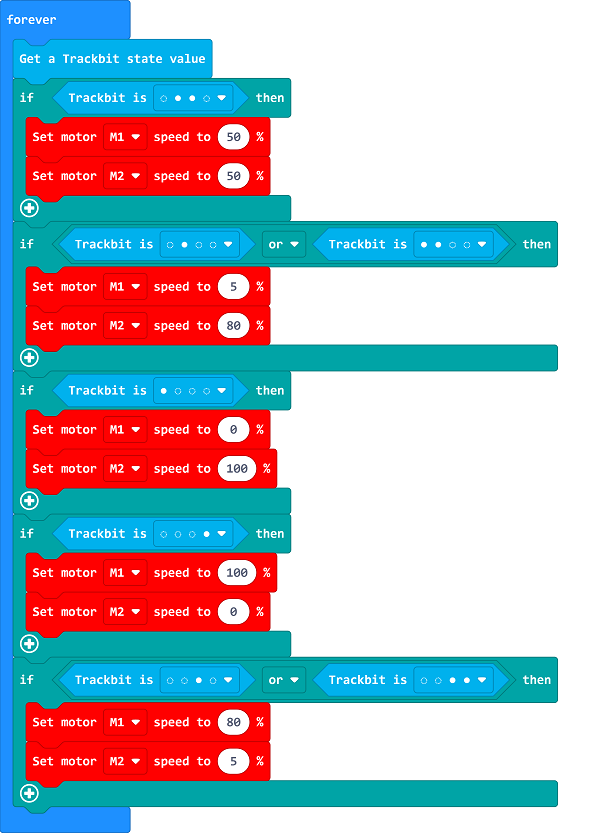
39.7.3. Code as below:#
Sample 1: Digital Line Following Program
39.7.4. Reference#
Link: https://makecode.microbit.org/_URyg36djehfc
You may also download it directly below:
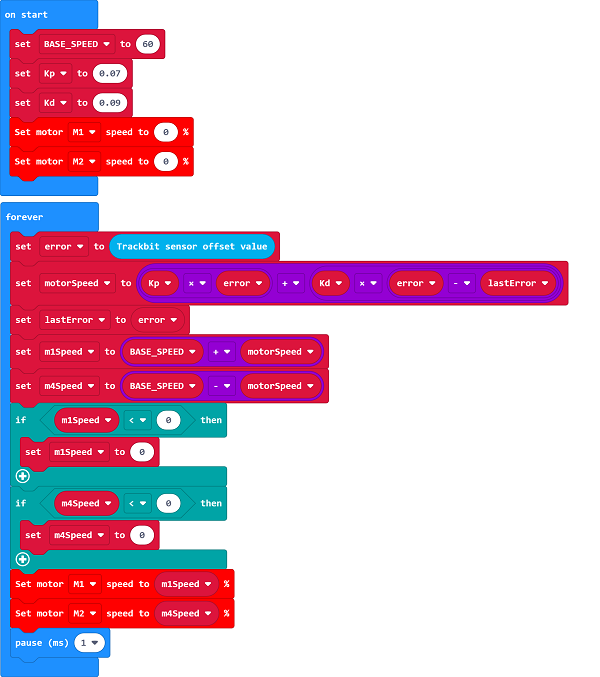
Sample 2: PID Line Following
Blocks Info:

The return value is the offset of the center point of the four-way line following sensor from the black line, the range is -3000~3000.
Sample Program
39.7.5. Reference#
Link: https://makecode.microbit.org/_8zu3d4VW5c7t
You may also download it directly below:
39.7.6. Result#
The car runs along with the black line.