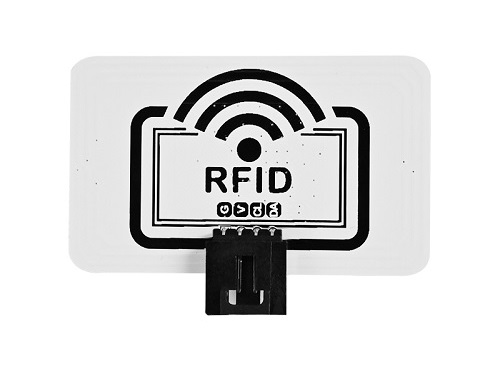
RFID Sensor(EF04105)
Contents
42. RFID Sensor(EF04105)#
42.1. Introducion#
RFID sensor uses the wireless radio frequency method to read and write to the recording media (electronic tag or radio frequency card), so as to achieve the purpose of recognizing the target and data exchange.
42.2. Products Link#
42.3. Characteristics#
The three pins GVS design is easy to plug and play.
42.4. Specifications#
| Item | Parameter |
|---|---|
| SKU | EF04105 |
| Connections | IIC |
| Connections Type | IIC |
| Working Voltage | 3.3V |
| Rated Current | 50mA |
| Core IC | PN5321A3 |
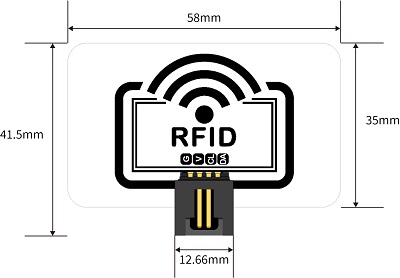
42.5. Outlook and Dimensions#
42.6. Quick to Start#
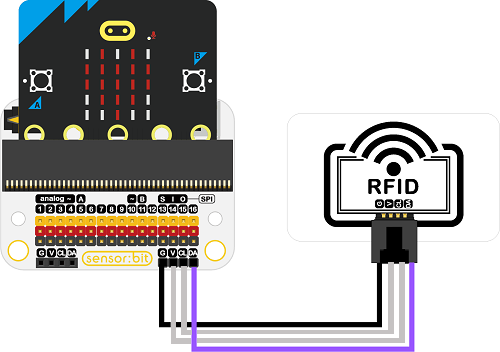
Materials required and connections diagram#
Connect the RFID sensor with the IIC port on Sensor:bit as the picture shows.
42.7. MakeCode Programming#
Add Extensions#
Click Extensions in the MakeCode drawer to see more choices.

For programming, we need to add a package: click “Extensions” at the bottom of the MakeCode drawer and search with https://github.com/elecfreaks/pxt-OctopusX in the dialogue box to download it.
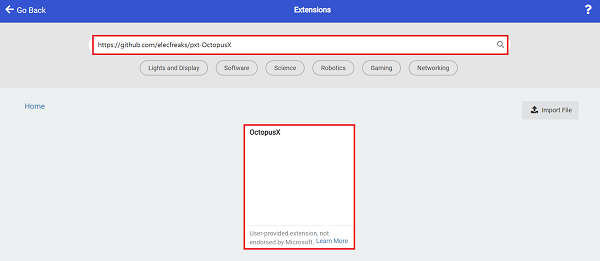
Notice: If you met a tip indicating that some codebases would be deleted due to incompatibility, you may continue as the tips say or create a new project in the menu.
Write Data via the RFID#
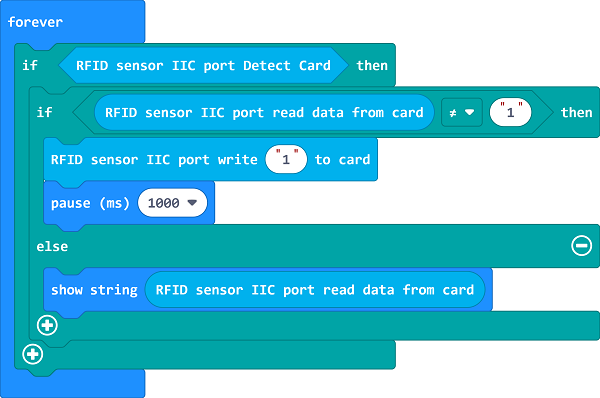
Reference link: https://makecode.microbit.org/_19ePfj3idL1h
You may also download it directly below:
Result#
After poweing on, put the electronic tag underneath the RFID, and the RFID shall write the data in the tag, then read the tag via the RFID and the data shall be displayed on the micro:bit screen.
RFID Reads Data#
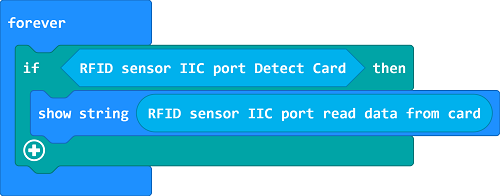
Reference link: https://makecode.microbit.org/_fXU8hWYc9Lhu
You may also download it directly below:
Result#
After poweing on, put the electronic tag underneath the RFID, the data shall be displayed on the micro:bit screen after reading the tag via the RFID.