Case 40:The Mechanical Motorcycle
Contents
44. Case 40:The Mechanical Motorcycle#
44.1. Introduction#
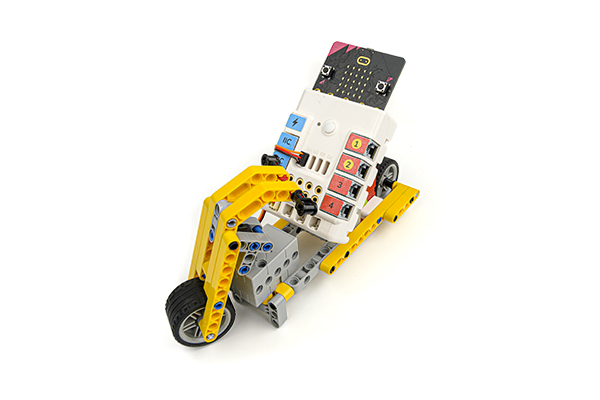
Build a mechanical motorcycle with the Nezha Inventor’s Kit.
44.2. Quick to Start#
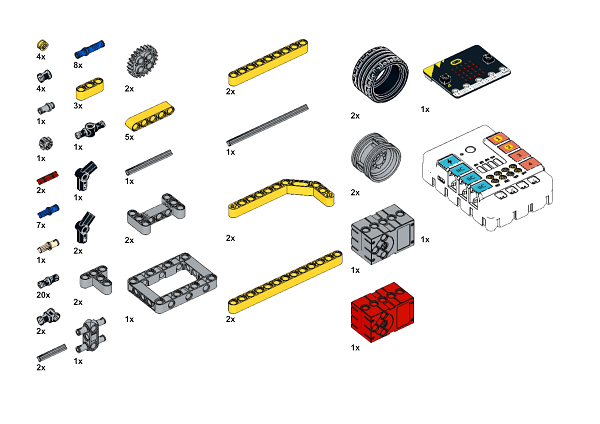
Materials Required#
Assembly#
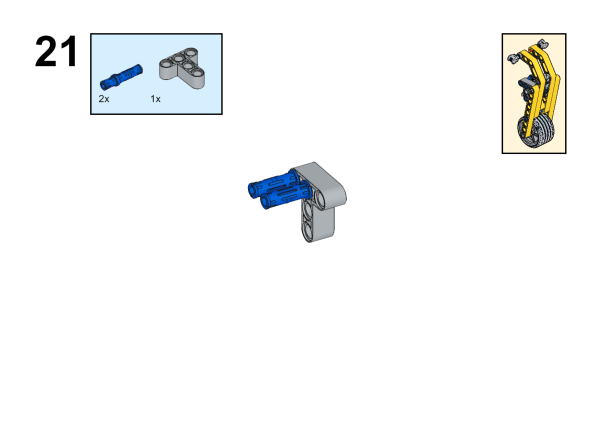
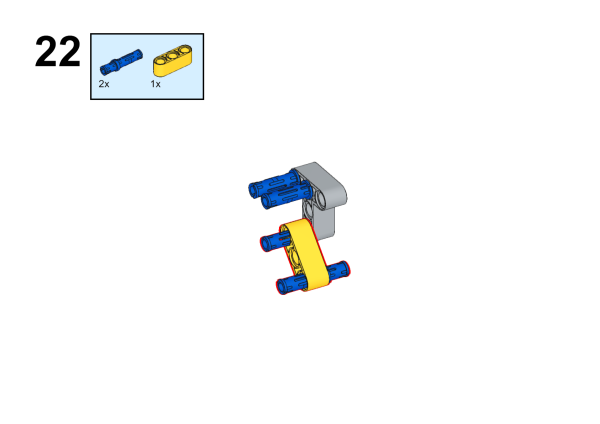
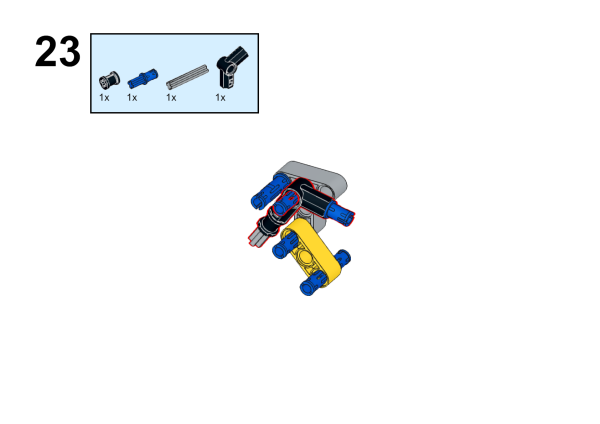
Components List
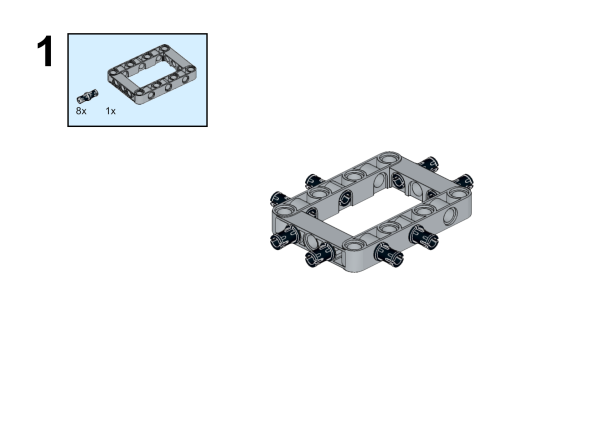
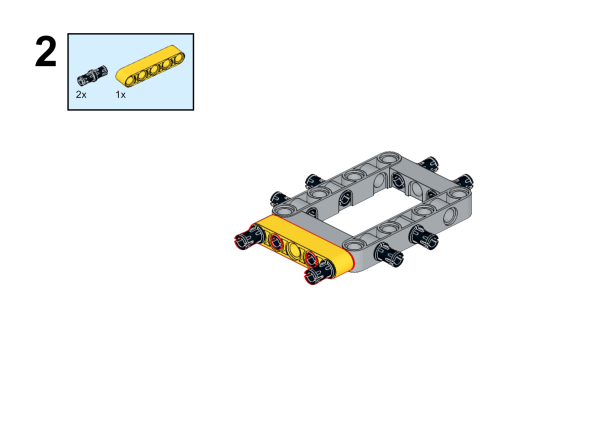
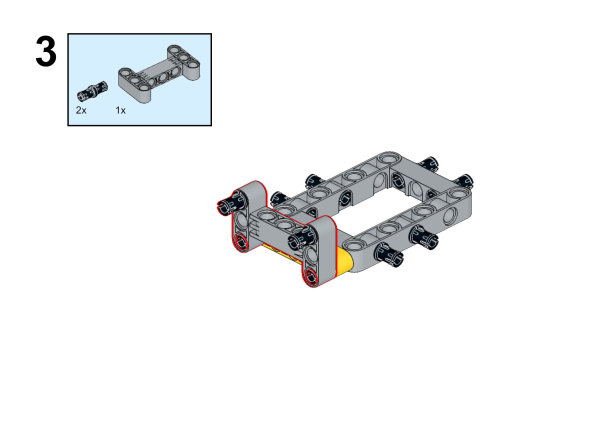
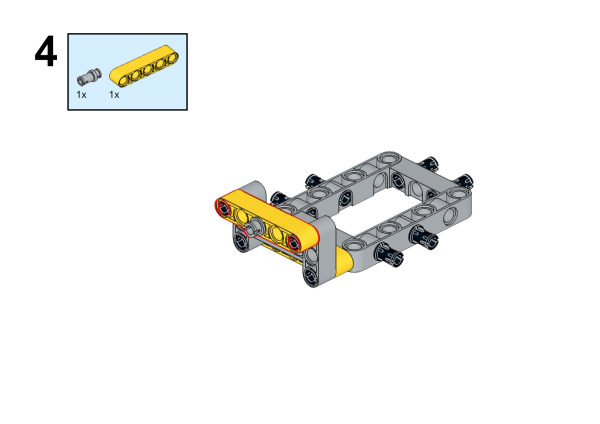
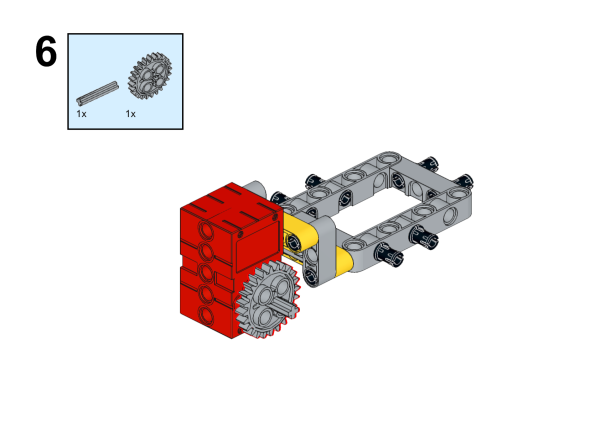
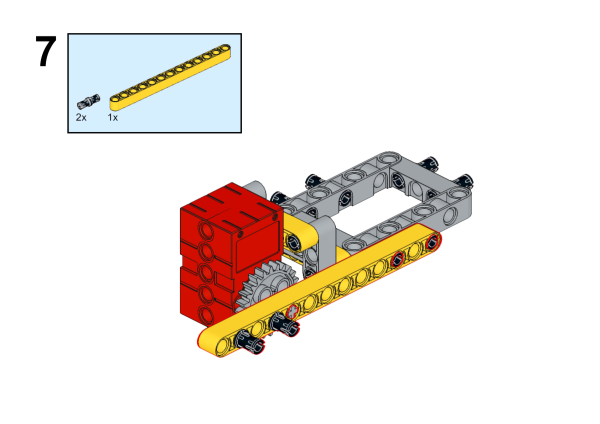
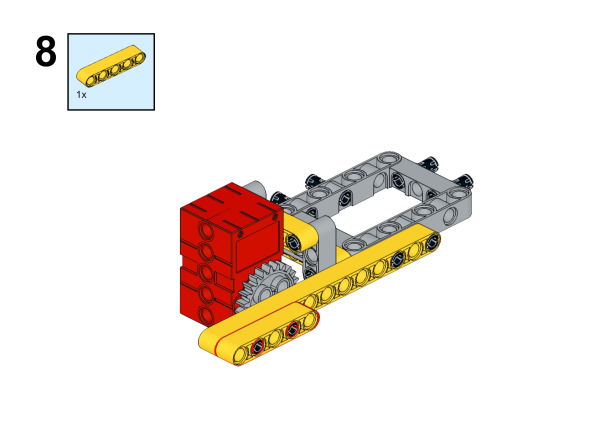
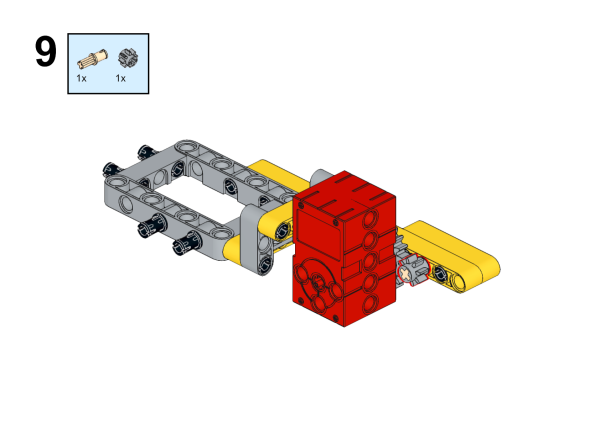
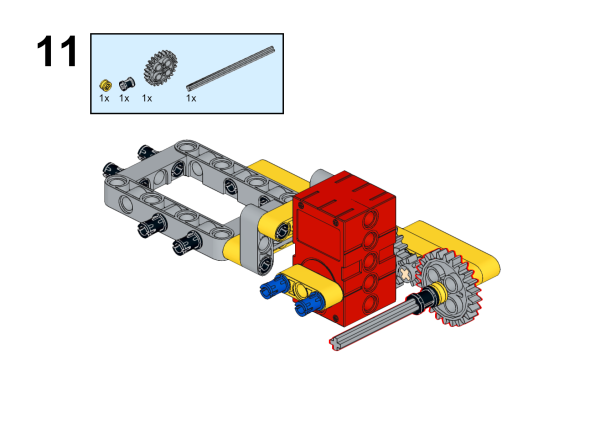
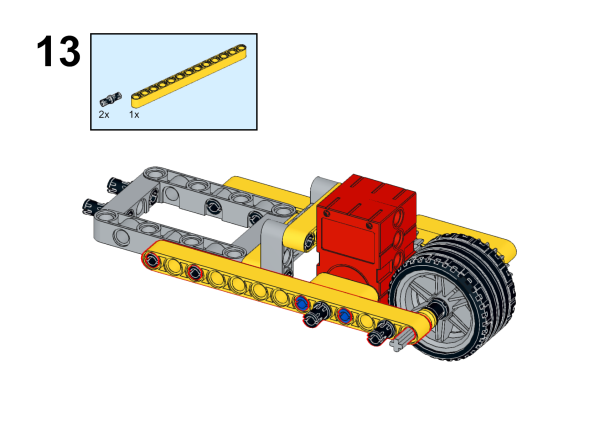
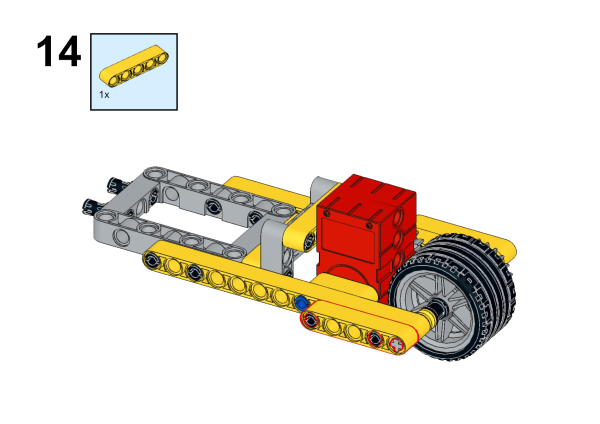
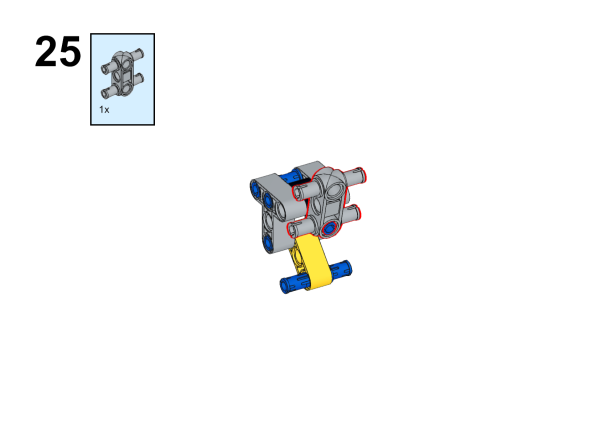
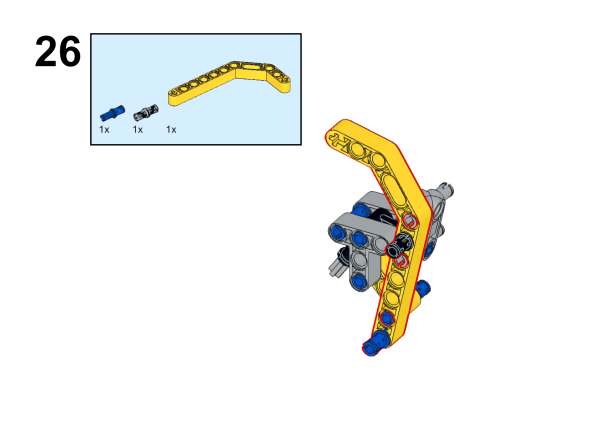
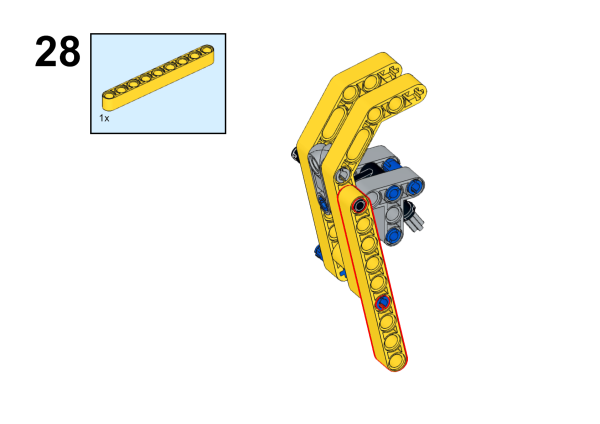
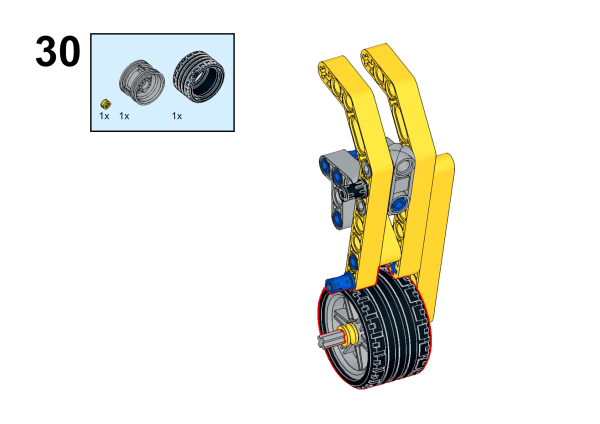
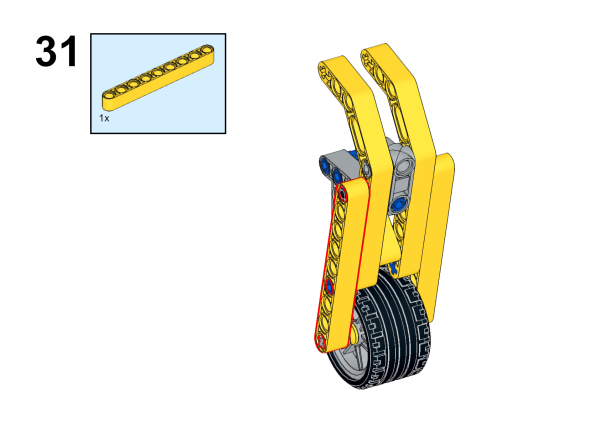
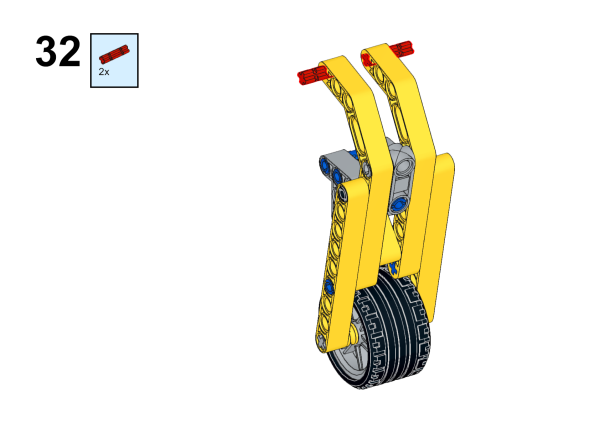
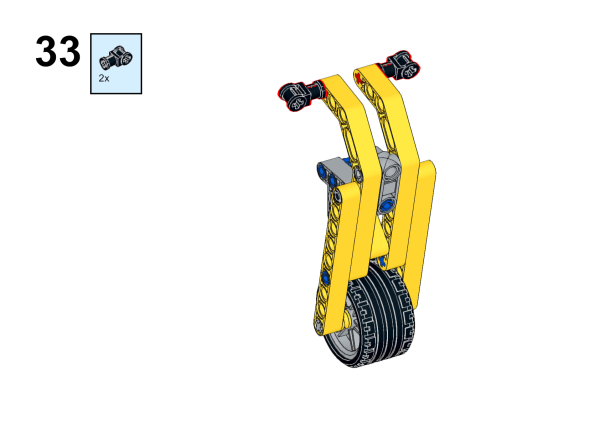
Build it as the pictures suggest:

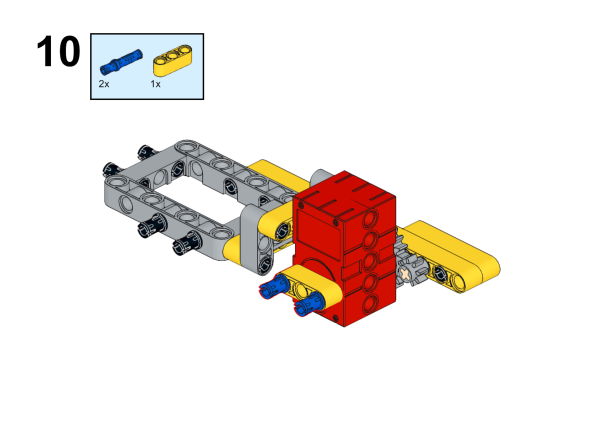

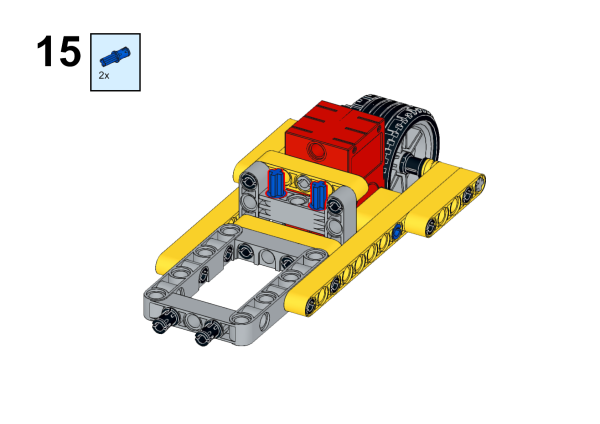
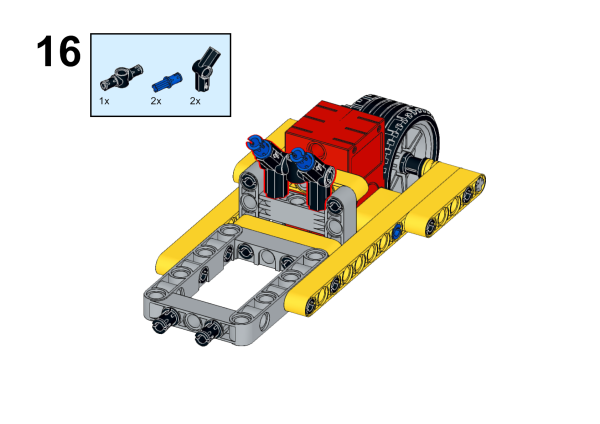
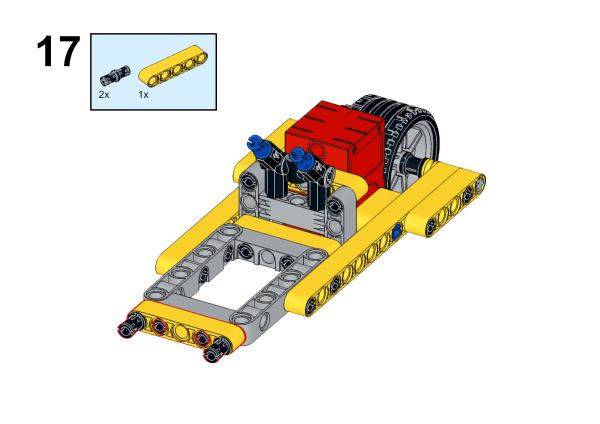
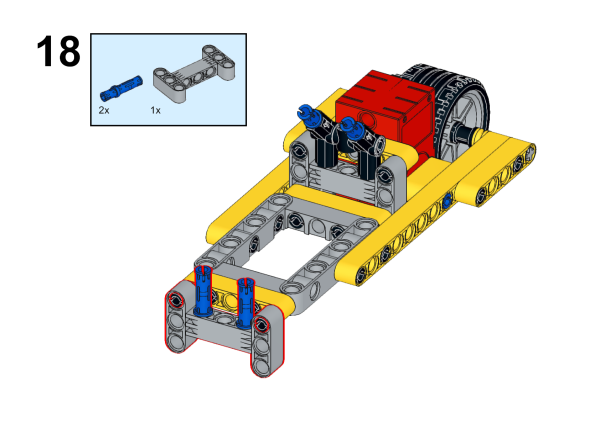
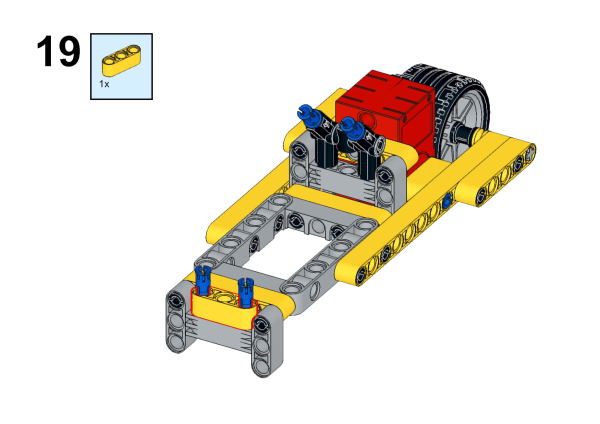

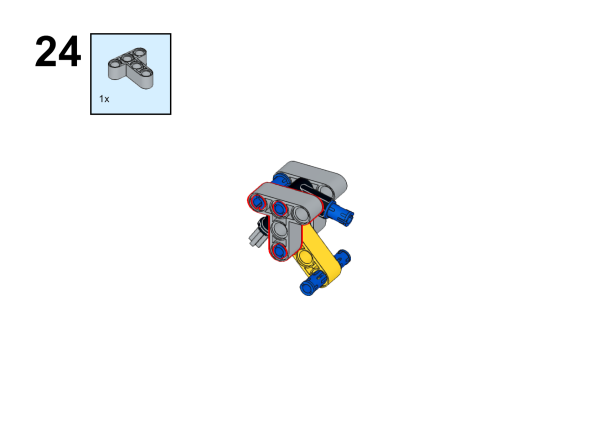

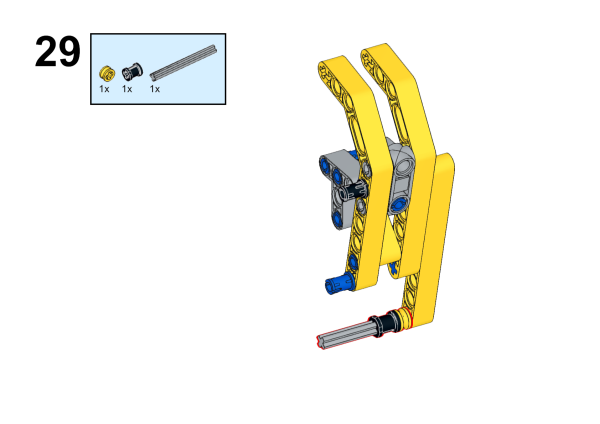
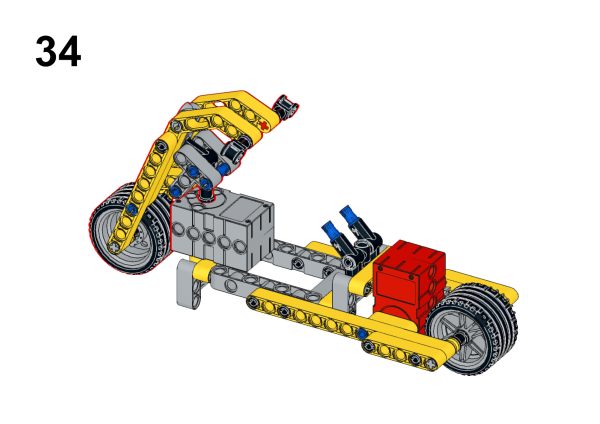
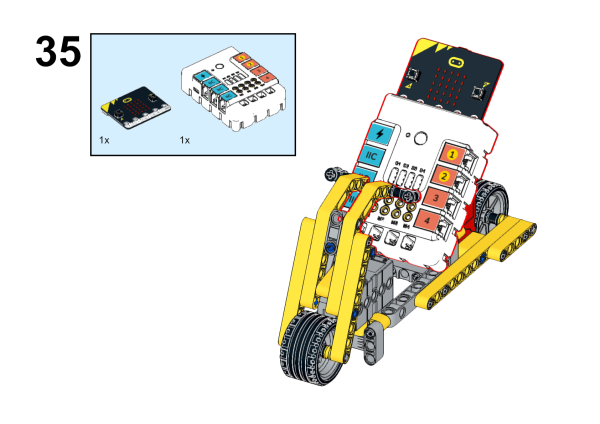
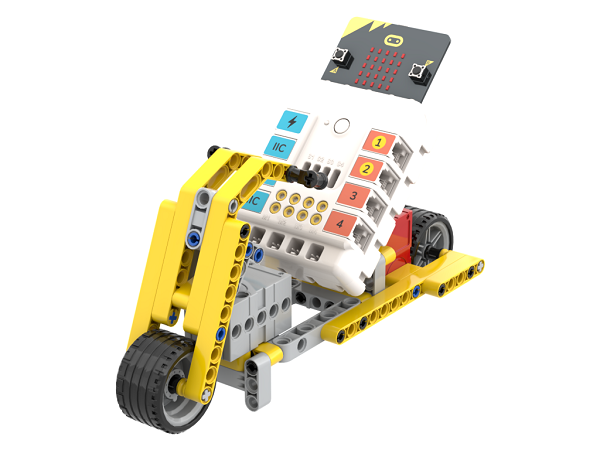
We can see that the construction is completed as shown in the following figure:
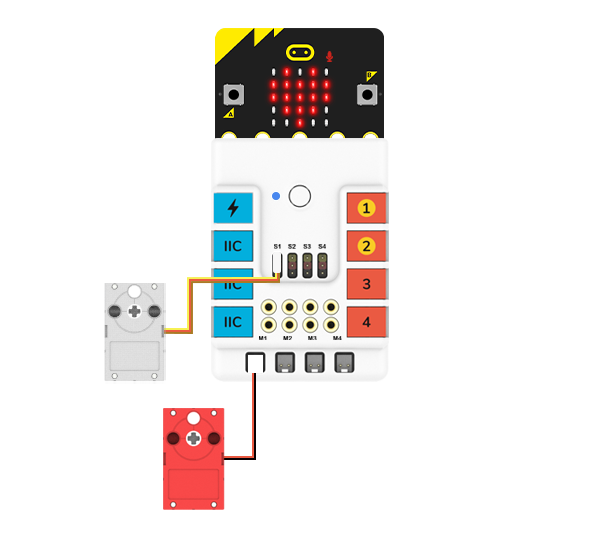
Connection Diagram#
Connect the the geekservo to S1 and the motors to M1 on Nezha Breakout Board.
44.3. MakeCode Programming#
Step 1#
Click “Advanced” in the MakeCode drawer to see more choices.
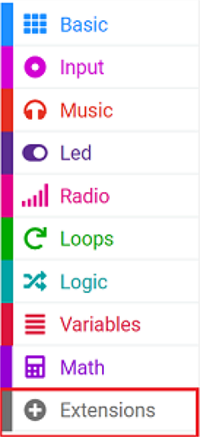
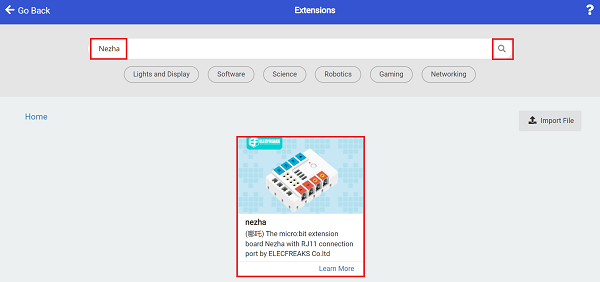
For programming Nezha Breakout Board, we need to add a package. Search with “Nezha” in the dialogue box and click to download it.
Notice: If you met a tip indicating that some codebases would be deleted due to incompatibility, you may continue as the tips say or create a new project in the menu.
Step 2#
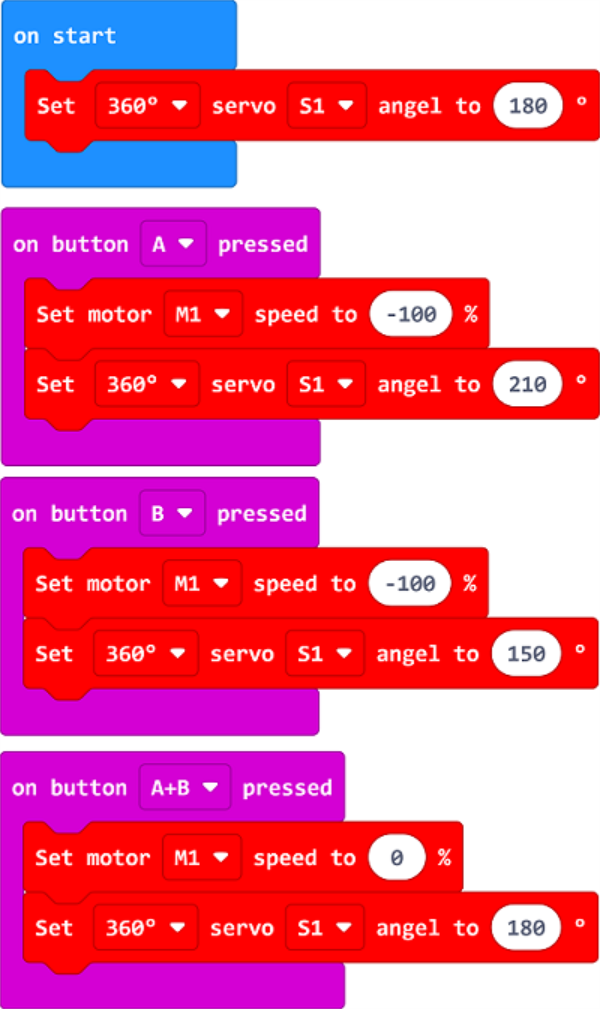
Code as the picture suggests#
Reference#
Link: https://makecode.microbit.org/_VtTc8DAsFWMc
You may also download it directly:
---Result#
When the button A is pressed, the motorcycle turns left; when the button B is pressed, it drives to the right; and when the buttons A and B are pressed at the same time, the motorcycle stops driving.