Case 67: The Blocks Emitter
Contents
71. Case 67: The Blocks Emitter#
71.1. Introduction#
Use Nezha 48 IN 1 Inventor’s Kit and Potentiometer to make a blocks emitter that can control the firing frequency with a knob and can be loaded automatically.
71.2. Case Building#
Materials Required#
Rubber bands
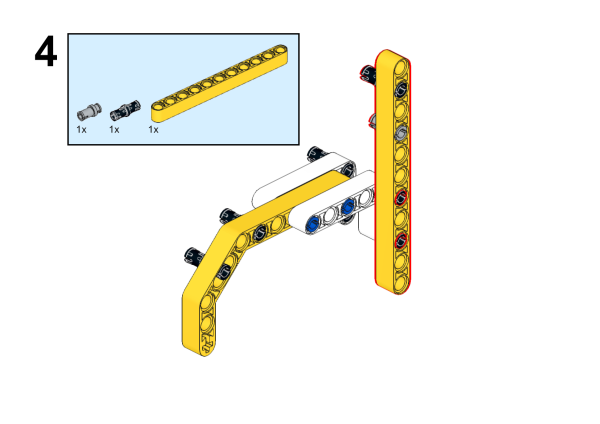
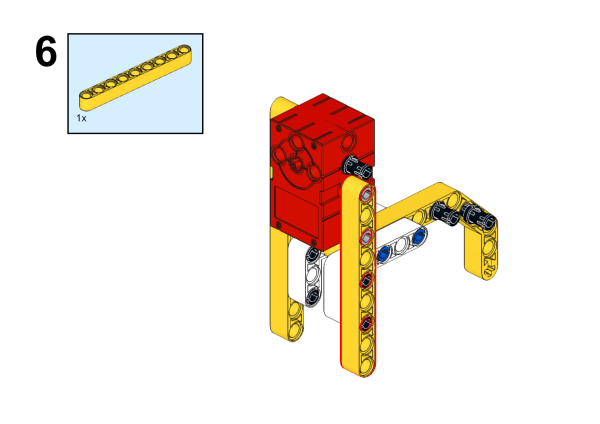
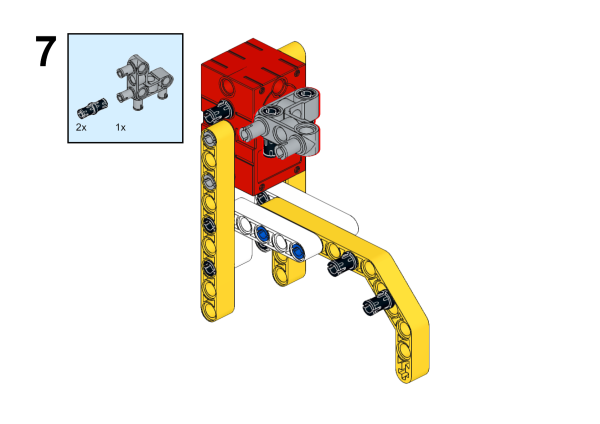
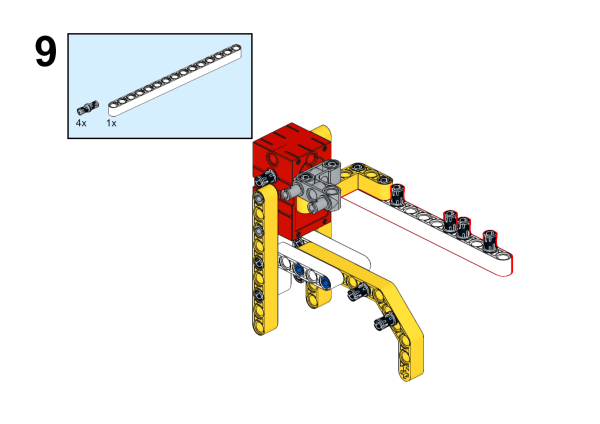
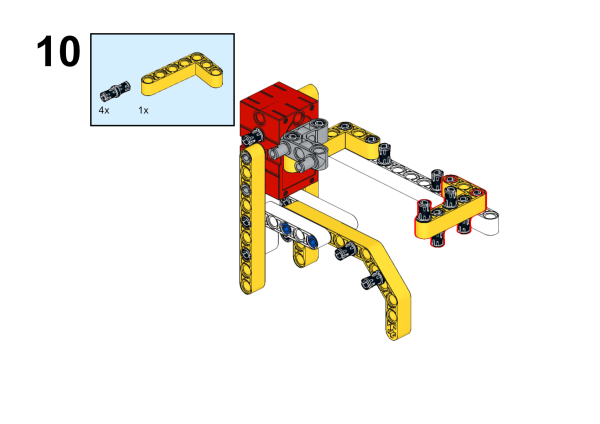
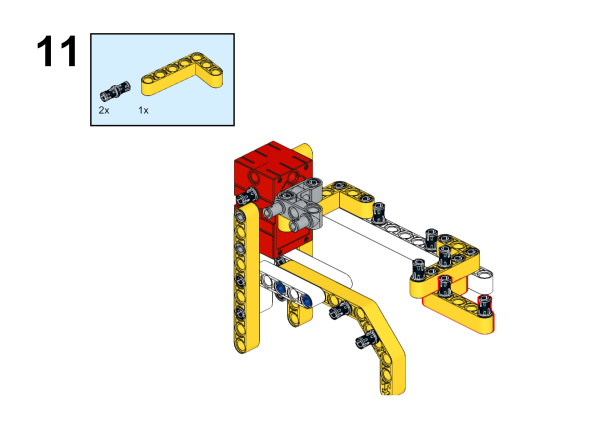
Assembly#
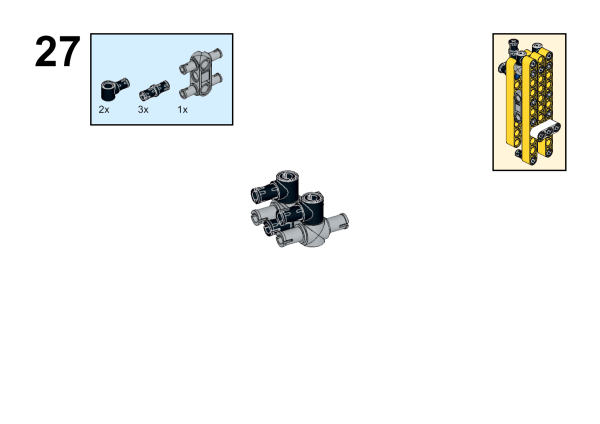
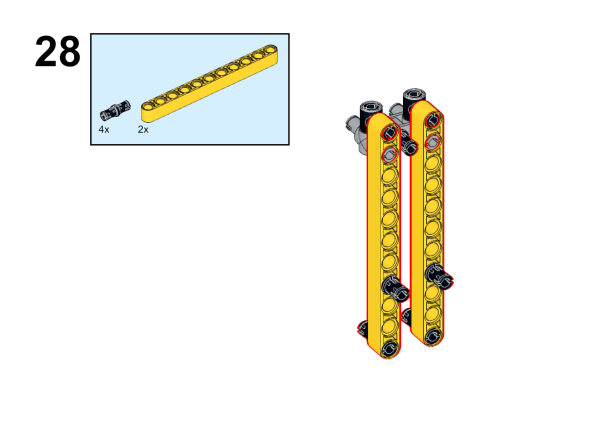
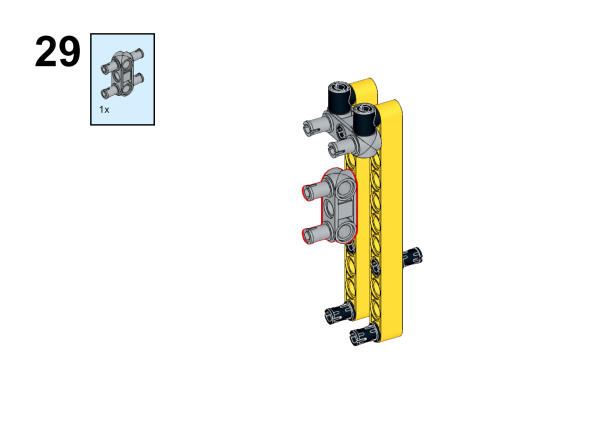
Parts list
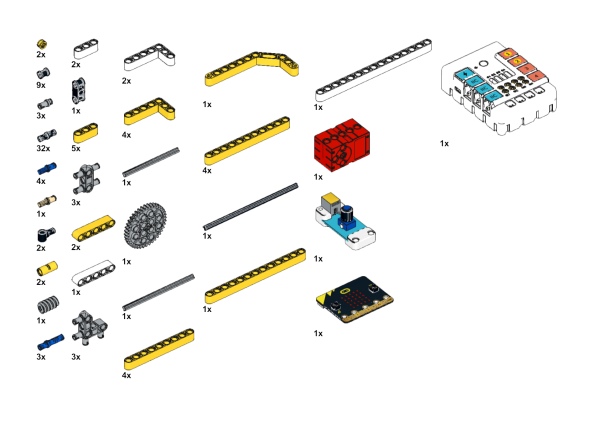
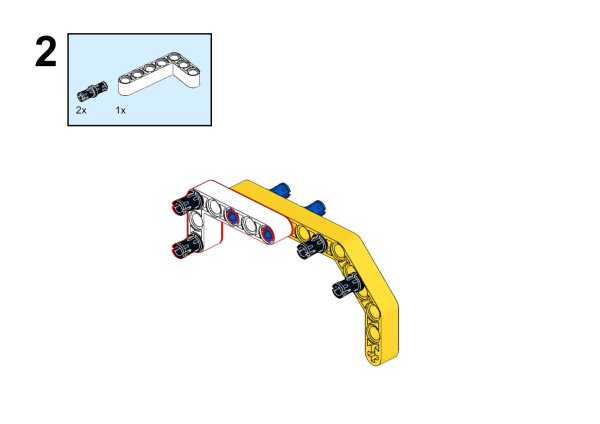
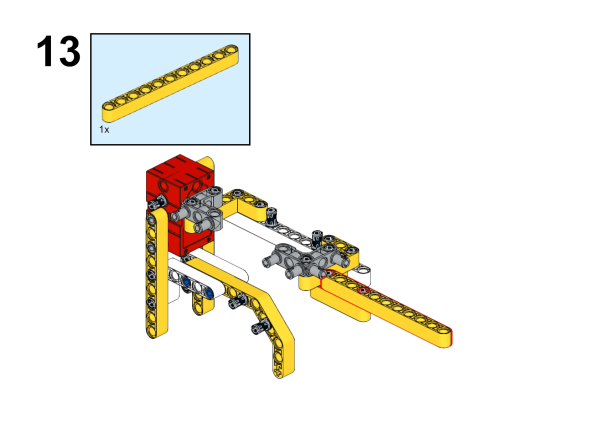
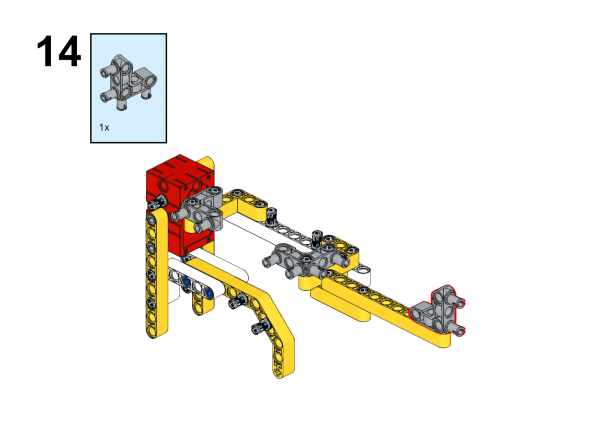
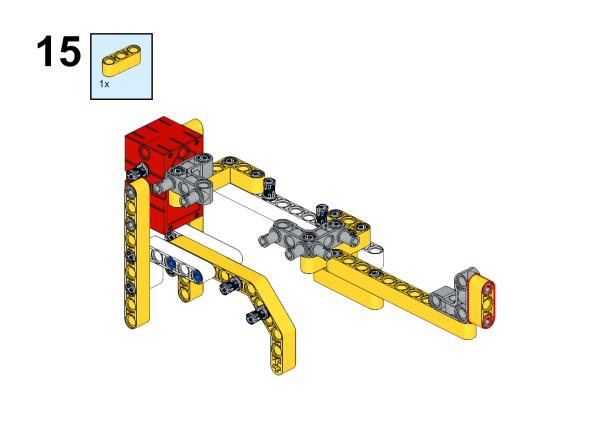
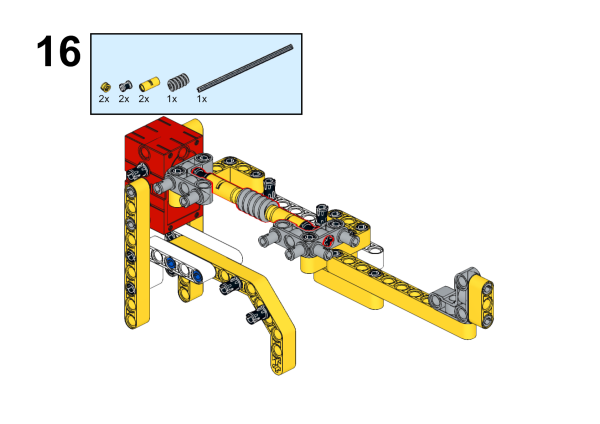
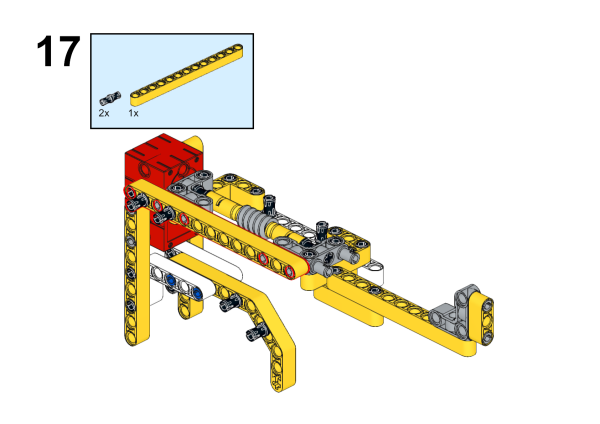
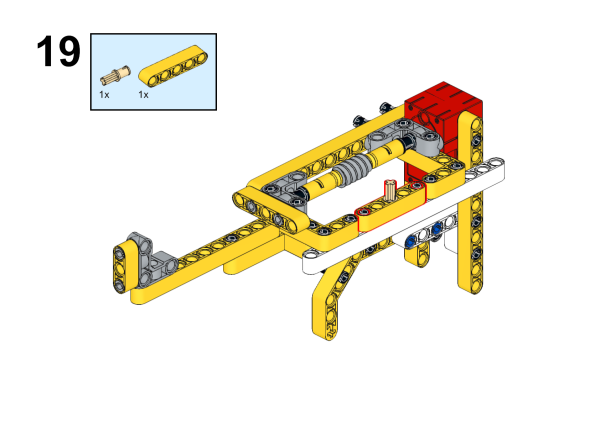
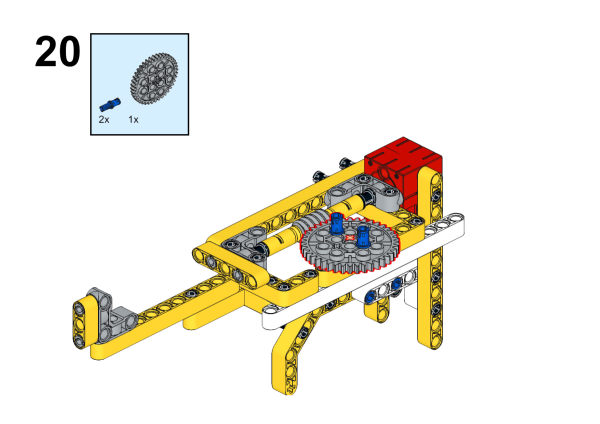
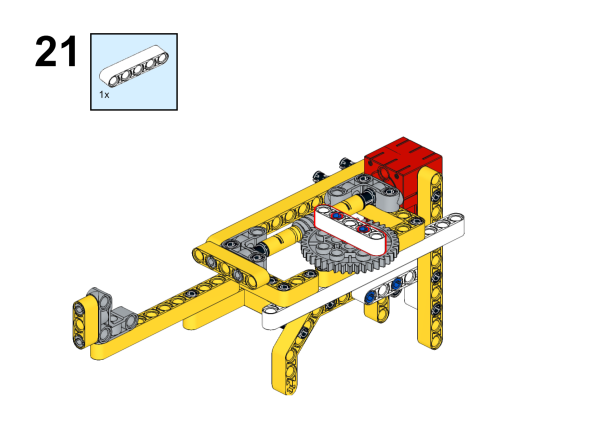
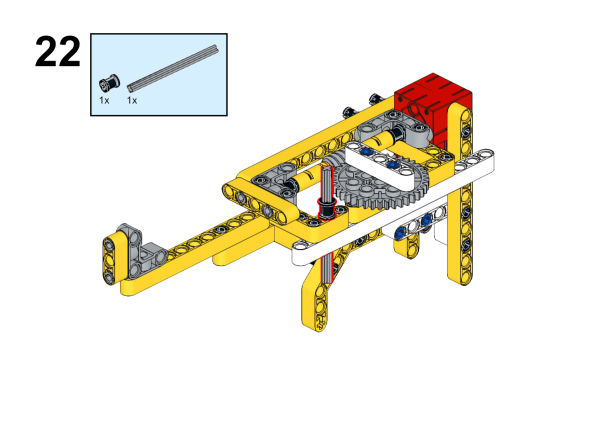
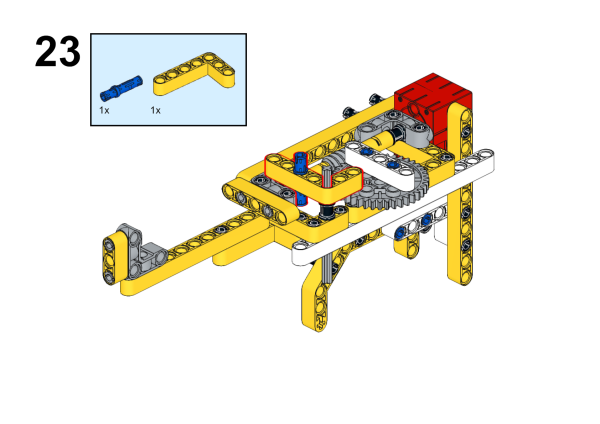
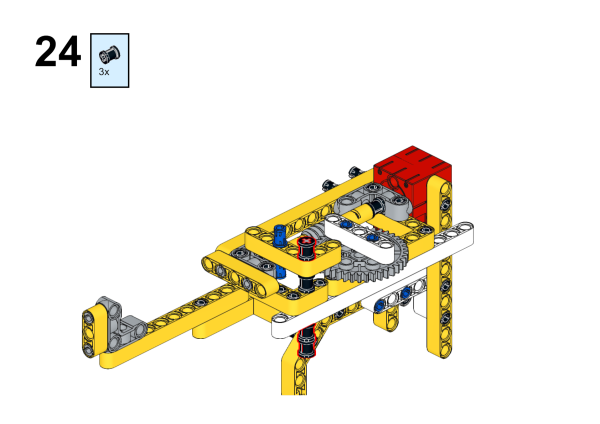
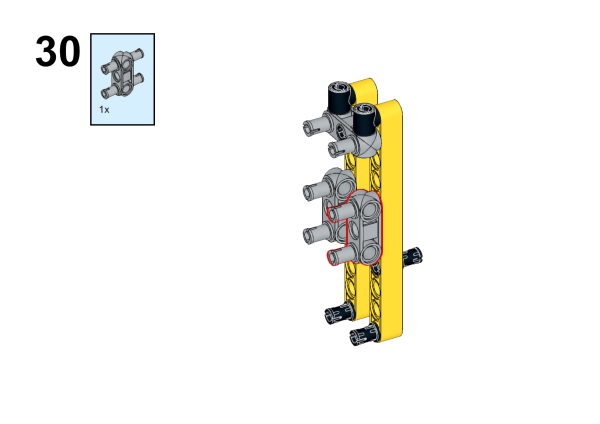
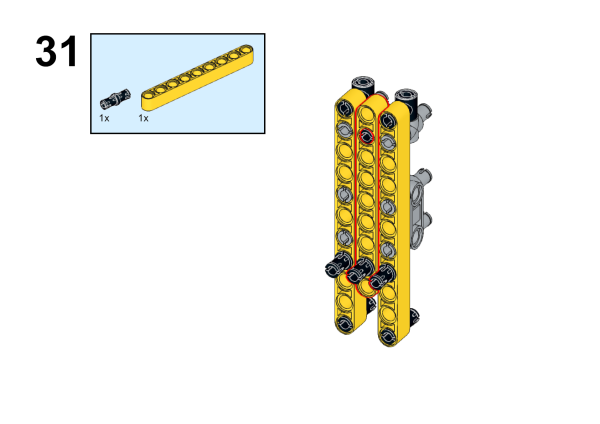
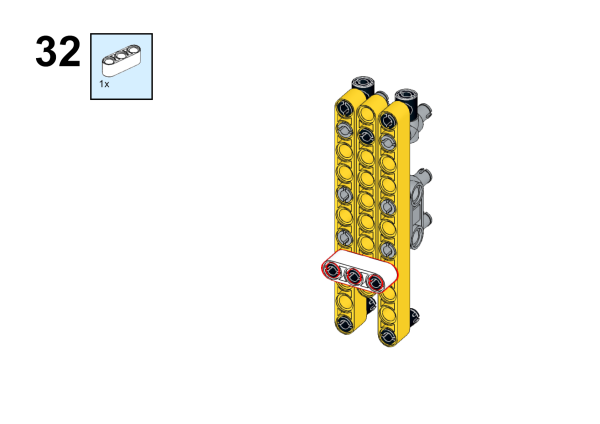
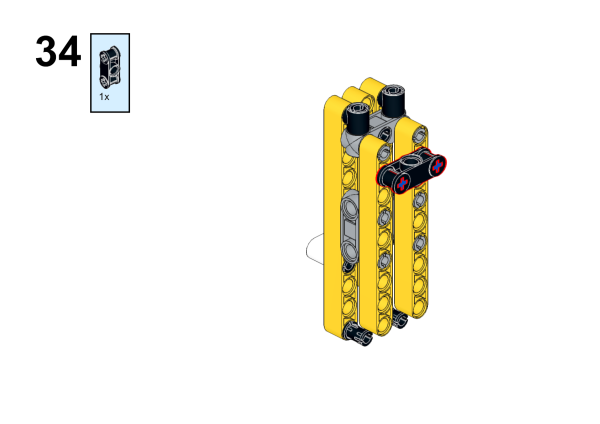
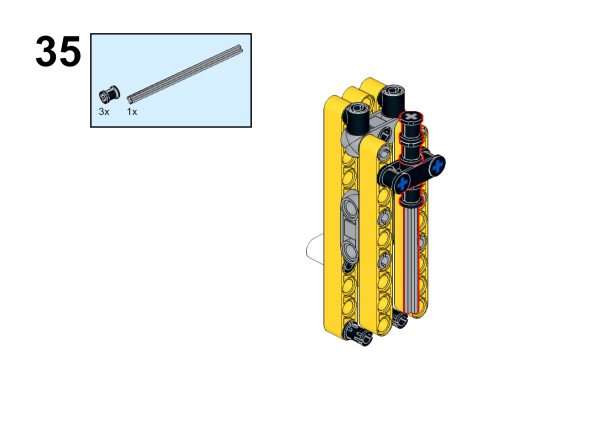
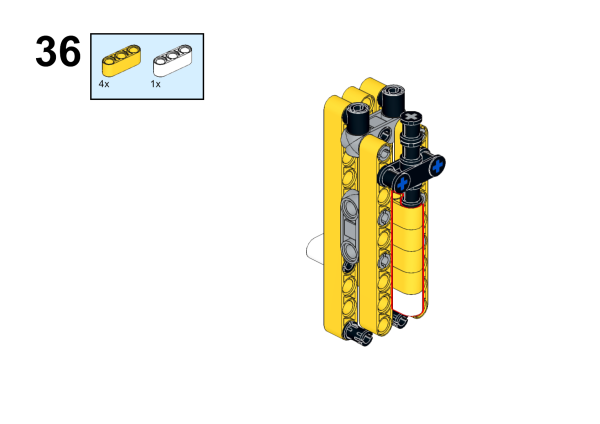
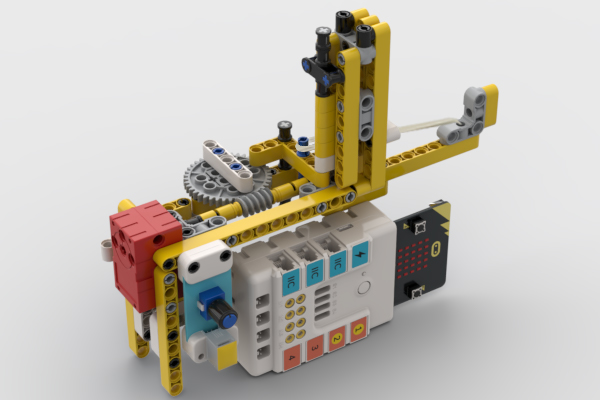
The structure is built as shown in the figure:


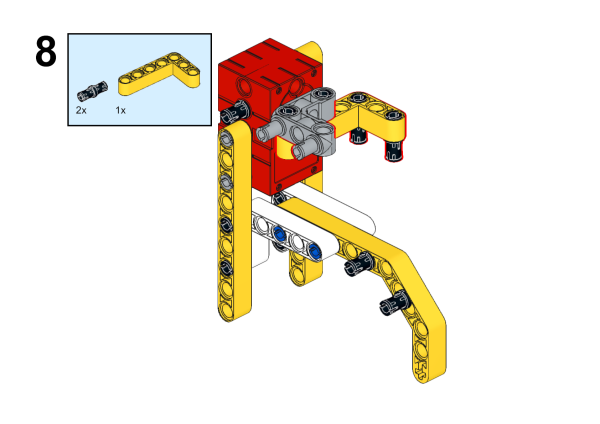
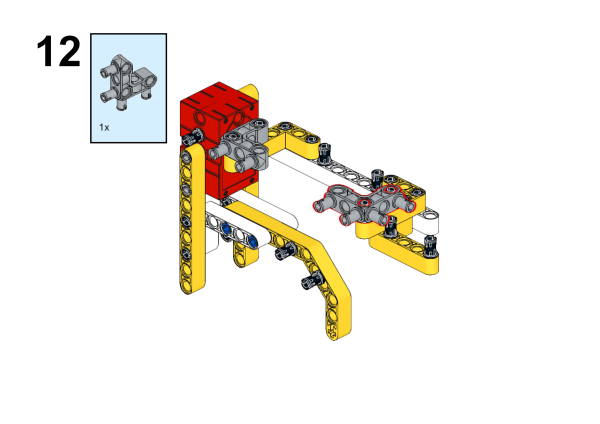

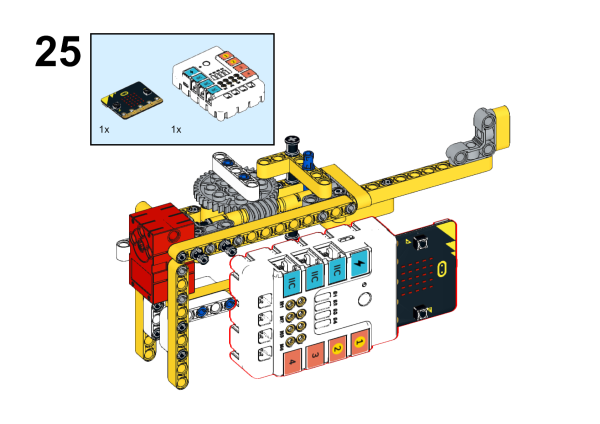
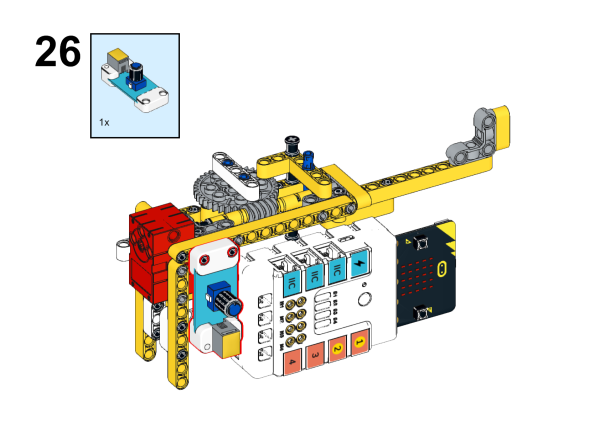
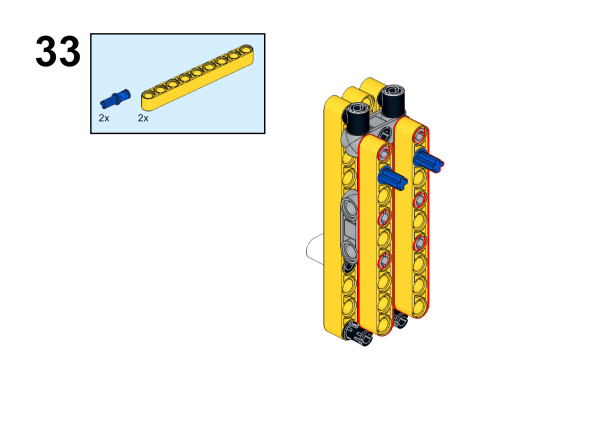
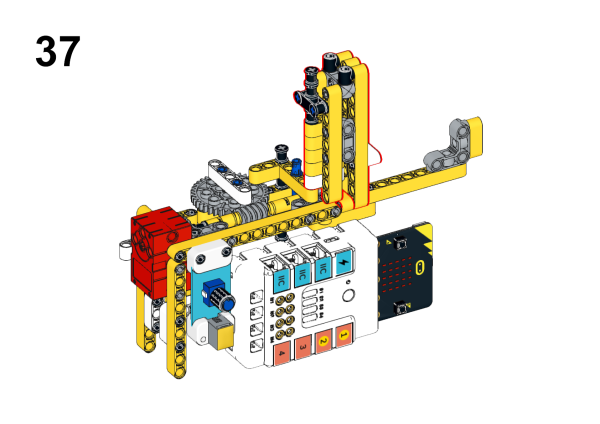
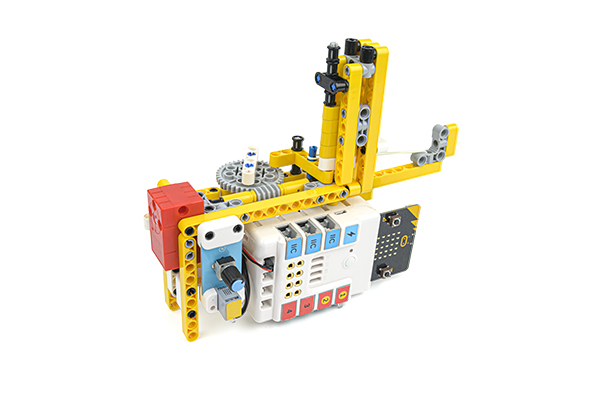
After the construction is completed, as shown in the following figure:
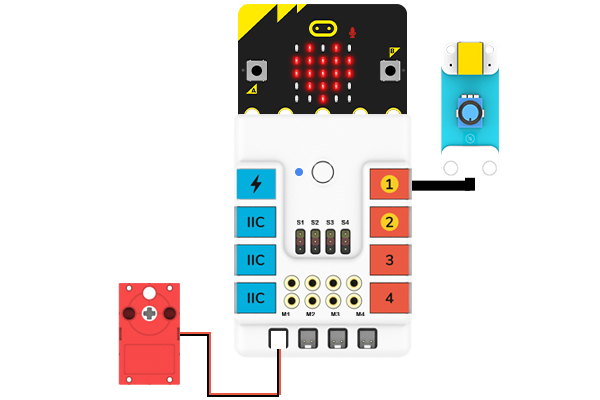
Connection Diagram#
Connect the Potentiometer to J1 port, and the Motor to M1 port on Nezha Breakout Board .
71.3. MakeCode Programming#
Step1#
Click “Advanced” in the MakeCode drawer to see more choices.
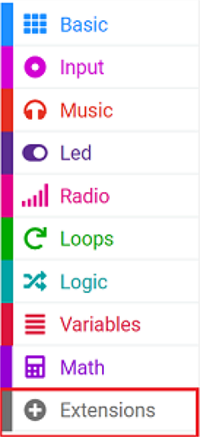
For programming the potentiometer, we need to add an extension library. Search with “PlanetX” in the dialog box to download this library.
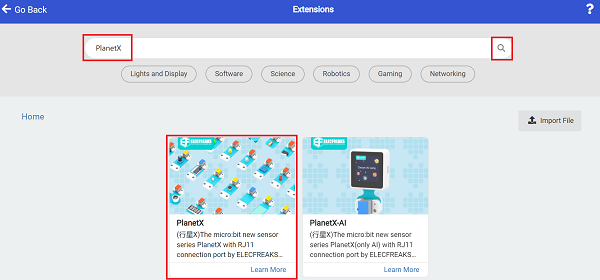
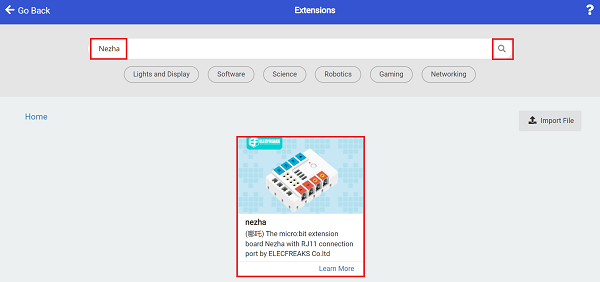
For programming the Nezha expansion board, we need to add an expansion library. Search with “Nezha” in the dialog box to download it.
Notice: If you met a tip indicating that some codebases would be deleted due to incompatibility, you may continue as the tips say or create a new project in the menu.
Step 2#
Write the program as the picture suggests#

Reference#
Link: https://makecode.microbit.org/_L7shxbLtVJYY
You may also download it directly:
Result#
The potentiometer allows you to control the firing frequency of the blocks emitter.