case 11 Avoid Asteroids
Contents
14. case 11 Avoid Asteroids#
Make your own little arcade game on the Micro:bit, and admire its 5 by 5 pixelate glory!
This tutorial was contributed by Josh Ho from Raffles Institution.
14.1. Products Link#
14.2. Step 0 – Pre-build Overview#
In this project, we are going to create a Raiden-esque game using Micro:bit and an ADKeyboard only . The aim of this game is to dodge the incoming projectiles, which increase in speed as the game goes on, for as long time as possible. The Micro:bit LED will be our screen and the ADKeyboard will be the controller.
14.3. Materials:#
1 x BBC Micro:bit
1 x Micro USB cable
1 x Breakout board
1 x ADKeyboard
Tips: If you want all components above, you may need ElecFreaks Micro:bit Tinker Kit
14.4. Goals:#
Make a simple game with Micro:bit.
Learn advanced programming logic.
Experiment with sprites.
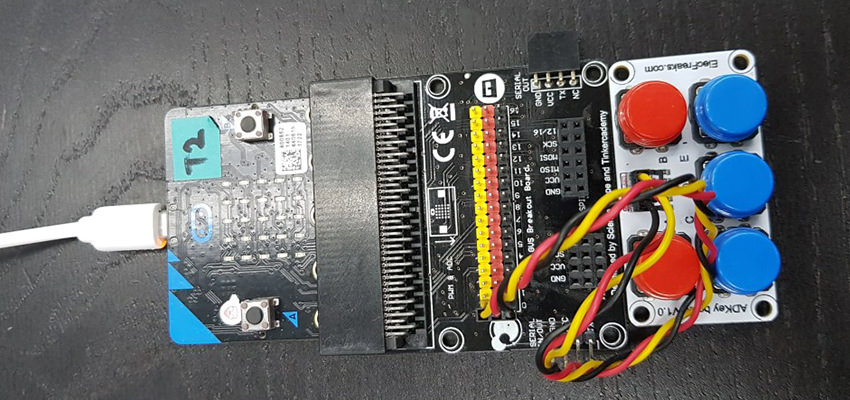
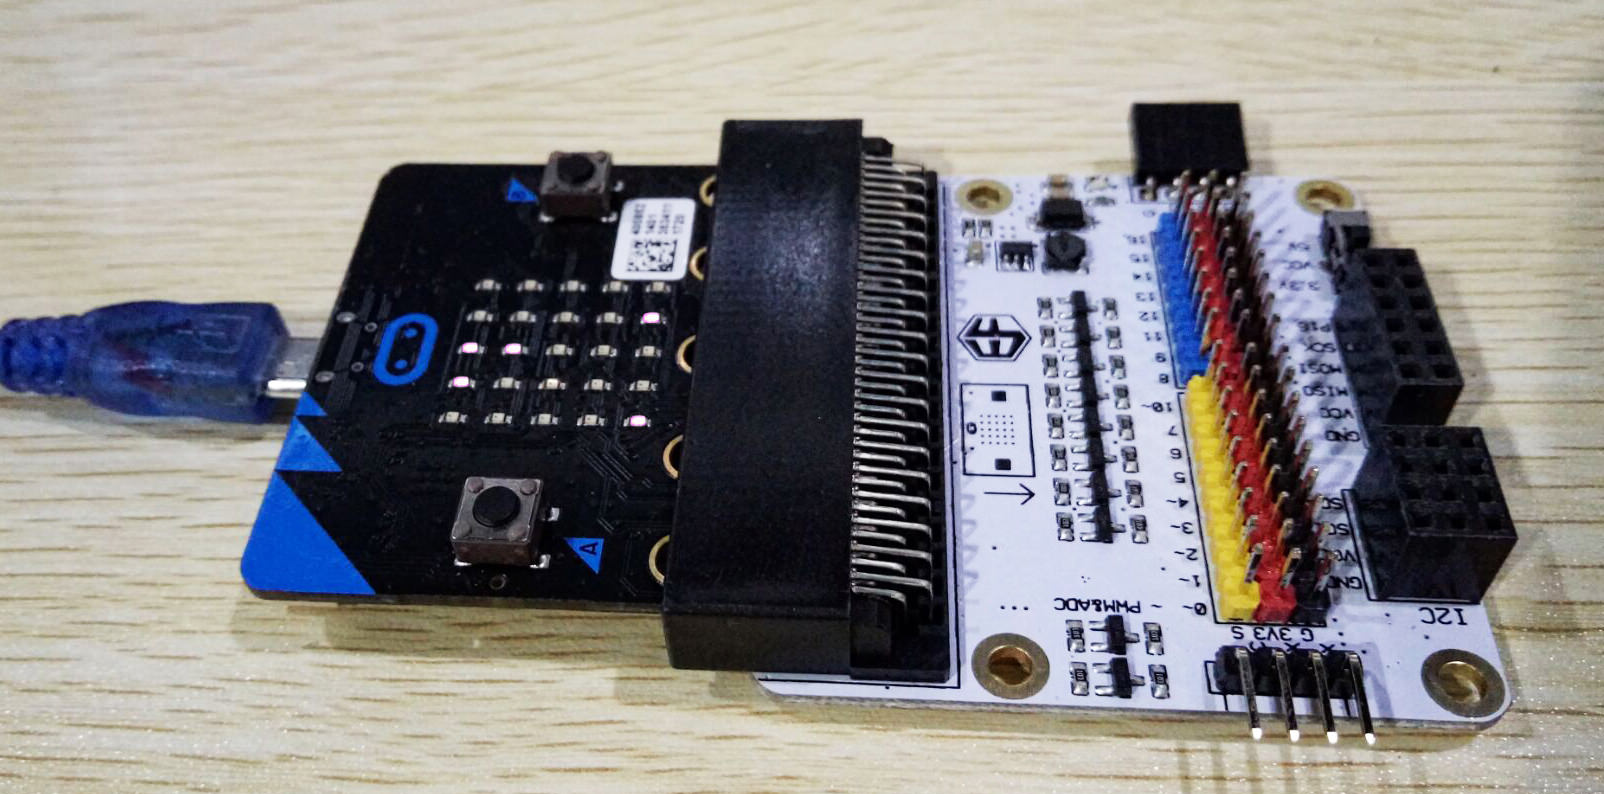
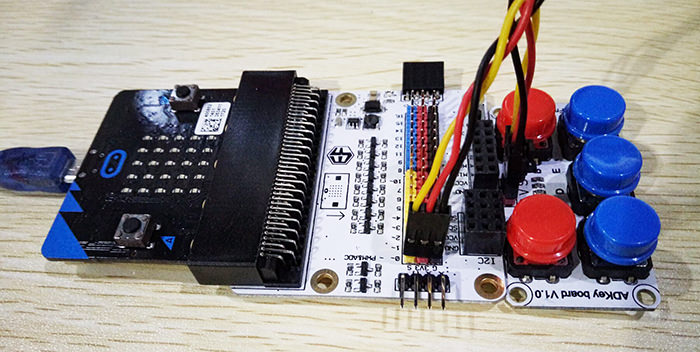
Step 1: Components#
The ADKeyboard is the only external component in this project. Just insert the Micro:bit into the breakout board before connecting the ADKeyboard. Make sure that the colors of the wires match the colors of the pins. Quite simple!
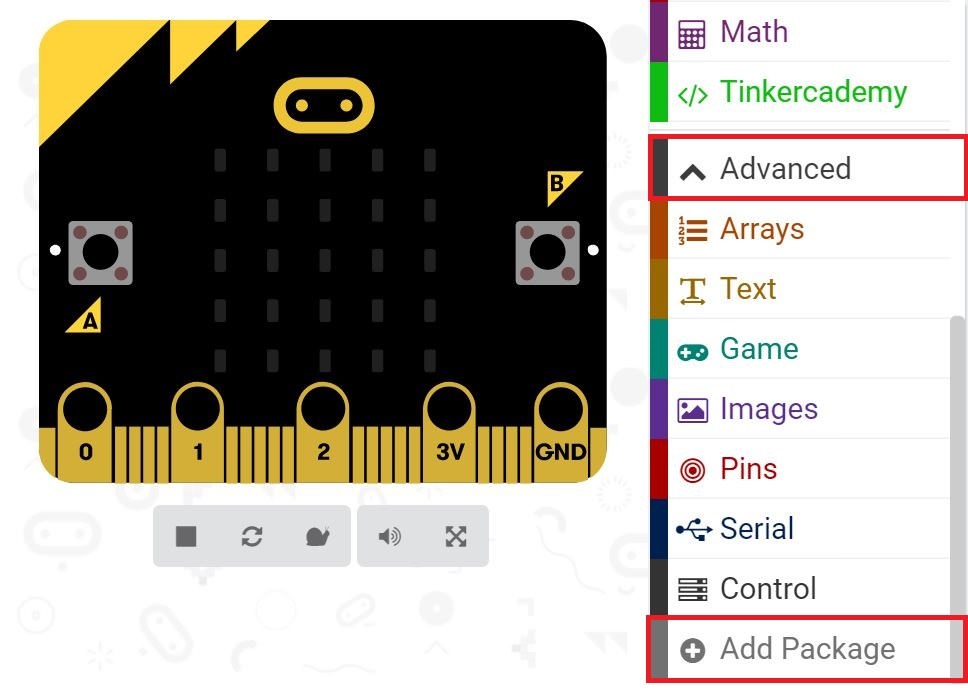
Step 2: Pre-coding#
We will add a package of code to enable us to use our kit components. Click on “Advanced” in the Code Drawer to see more code section and look at the bottom of the Code Drawer for “Add Package”.
This will open up a dialog box. Search for “tinker kit” and then click on it to download this package.
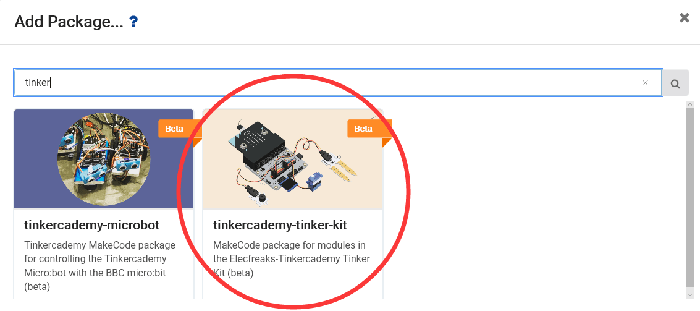
Note: If you get a warning telling you some packages will be removed because of incompatibility issues, you should either follow the prompts or create a new project in the Projects file menu.
Step 3: Coding#
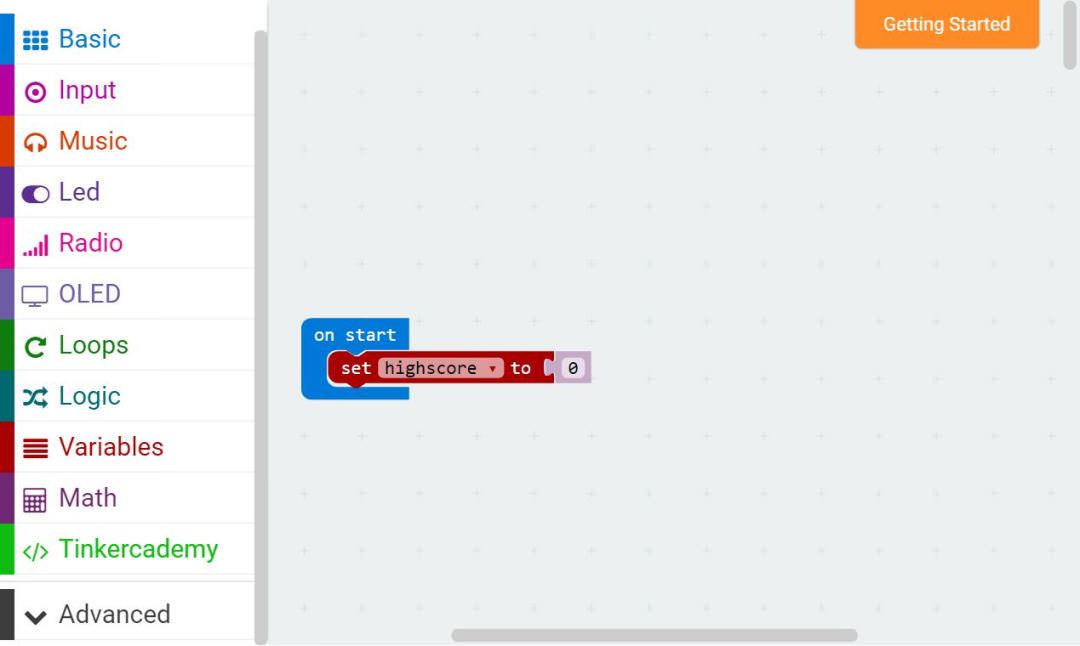
Variables allow us to store data in the program. We will use it to store our scores in the game.
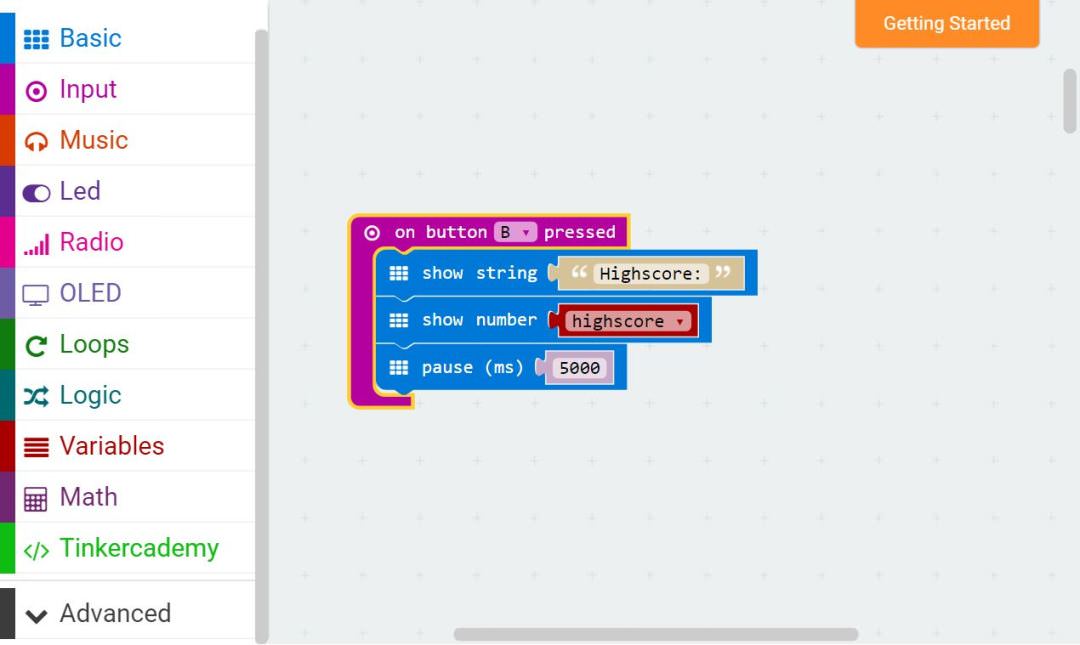
We will use a button on the Micro:bit (button B) to show the high score when the game is not in progress. The code block “On button B pressed” fulfills this condition, and within that block, the variable “highscore” will be displayed.
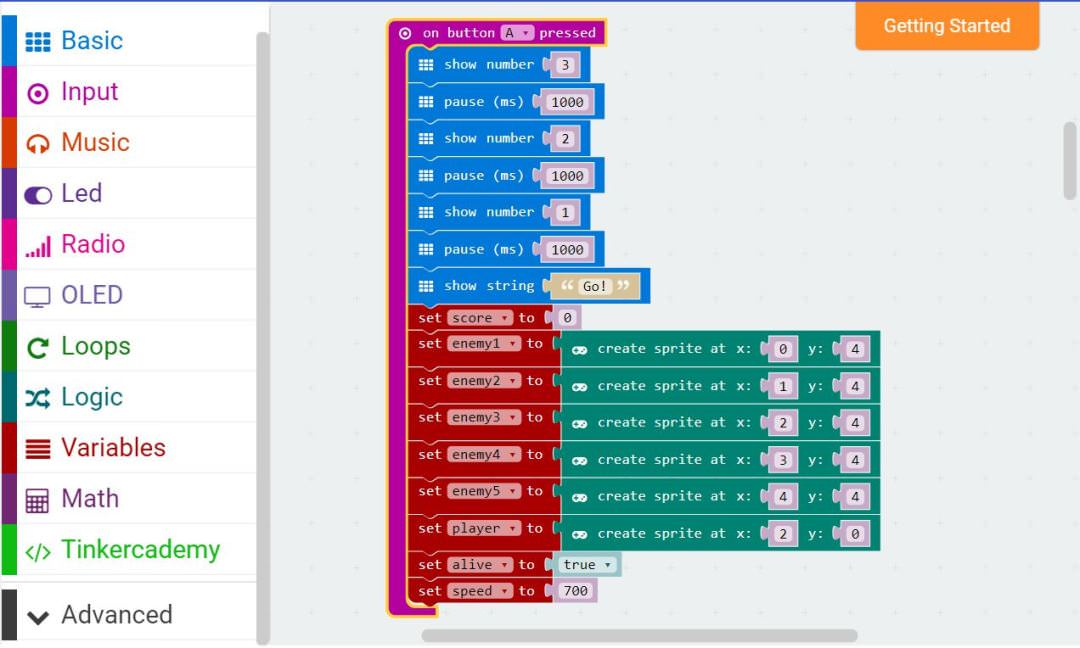
We will use button A to start the game, which will trigger the countdown. Before anything happened, we must initialize the sprites in the game. Sprites are basically entities represented by a single LED on the Micro:bit screen. They can move around and change direction using the code blocks provided in MakeCode. We will also initialize the variables “alive”, a boolean which accounts for whether the player is still alive, and “speed”, which determines how fast the projectiles move. Counter-intuitively, the lower the number, the faster the projectiles move.
Next, we will add a while loop. A while loop will repeatedly run itself as long as the conditions specified are met. In this case, only if the player is still alive, the game will continue to run.
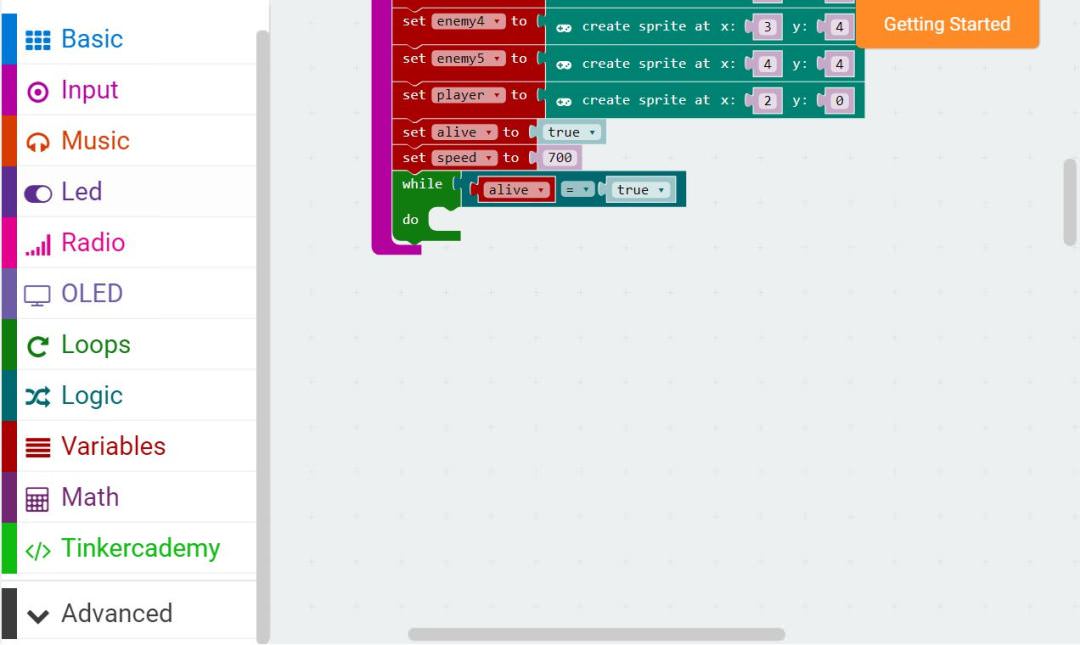
Note: Be careful here! Because the while loops do have the potential to crash your Micro:bit.
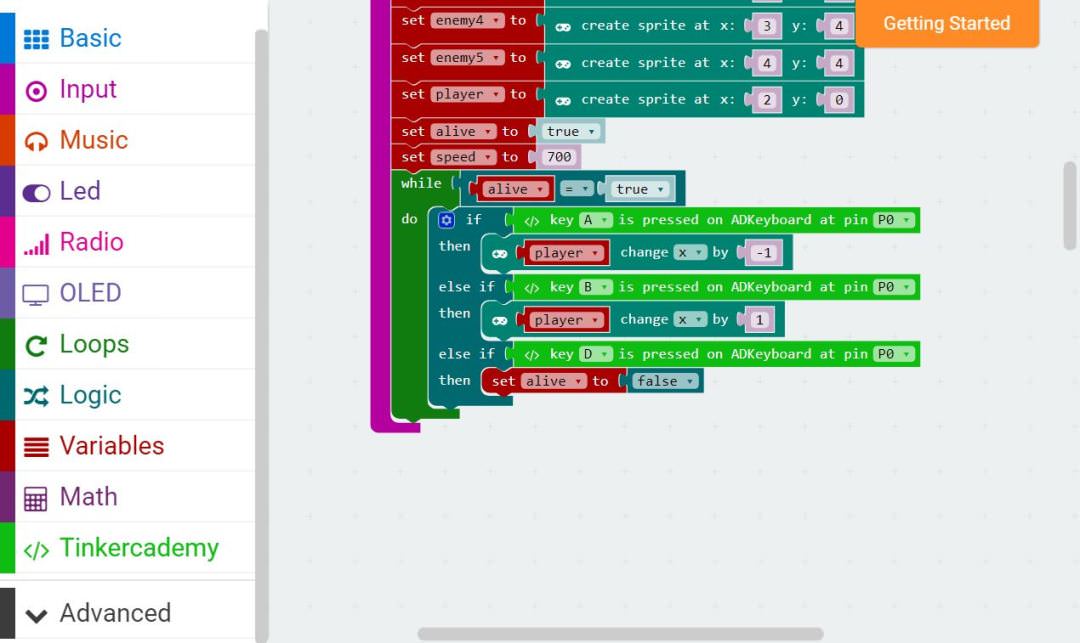
Inside the loop, we will add a group of code which governs the control of the game – the ADKeyboard. When the red A button is pressed, the sprite will move left. When the red B button is pressed, the sprite will move right. When the blue D button is pressed, the game will immediately stop.
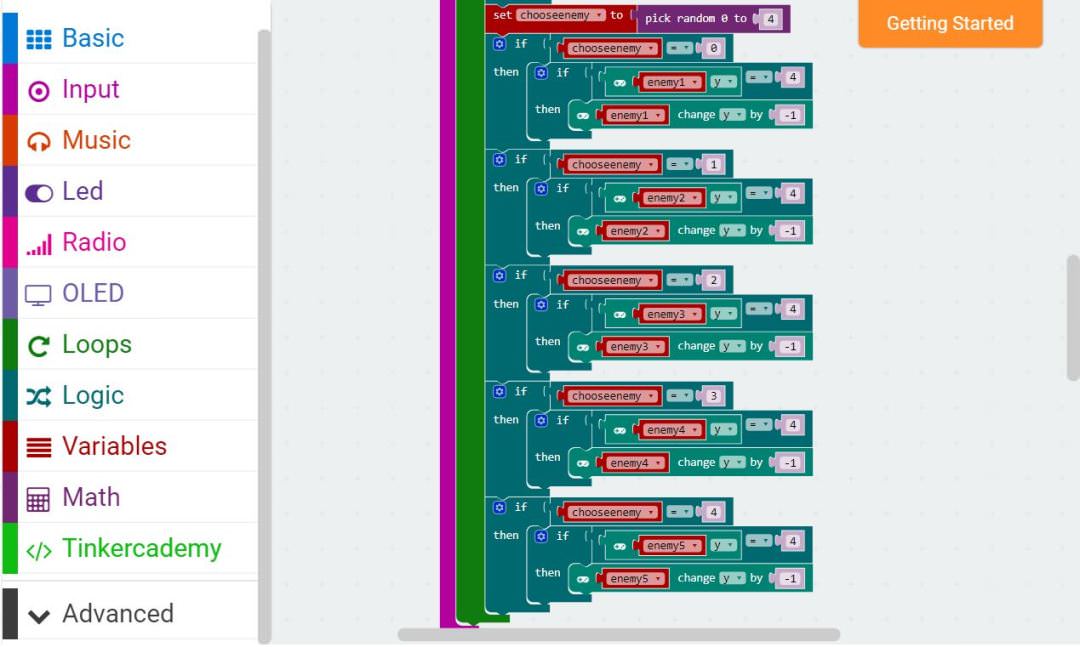
After that, we will code for the enemy projectile’s movement. First we will choose a random number using the pick random block from the Math module. This number will determine which projectile will start moving up by 1. However, this only applies if the projectiles are on the bottom row, as we will have more code which determines the behaviour of the projectiles when they are off of the bottom row.
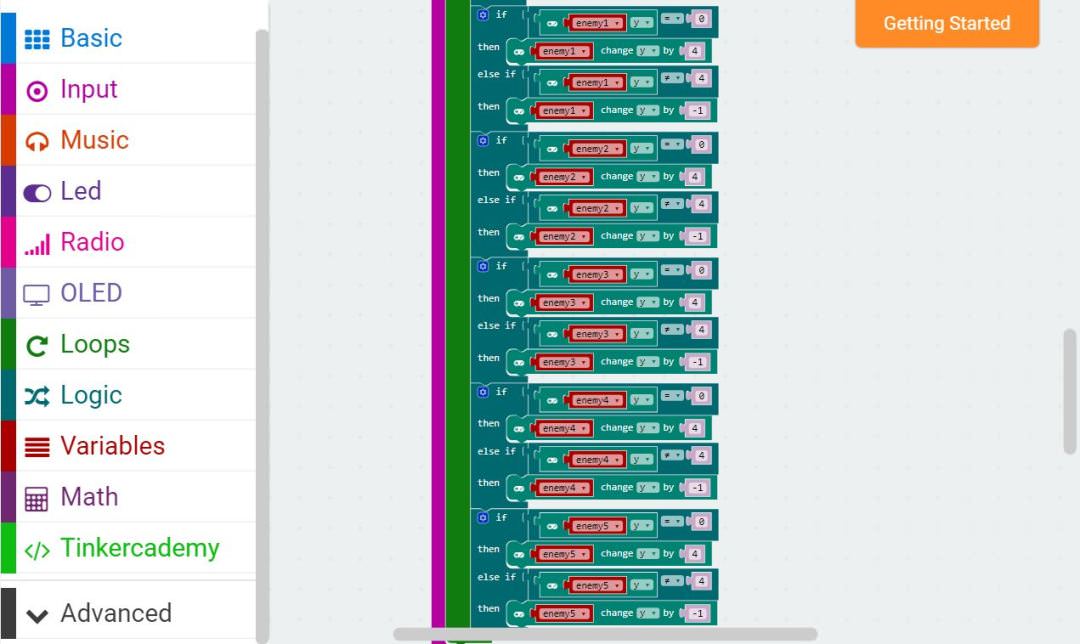
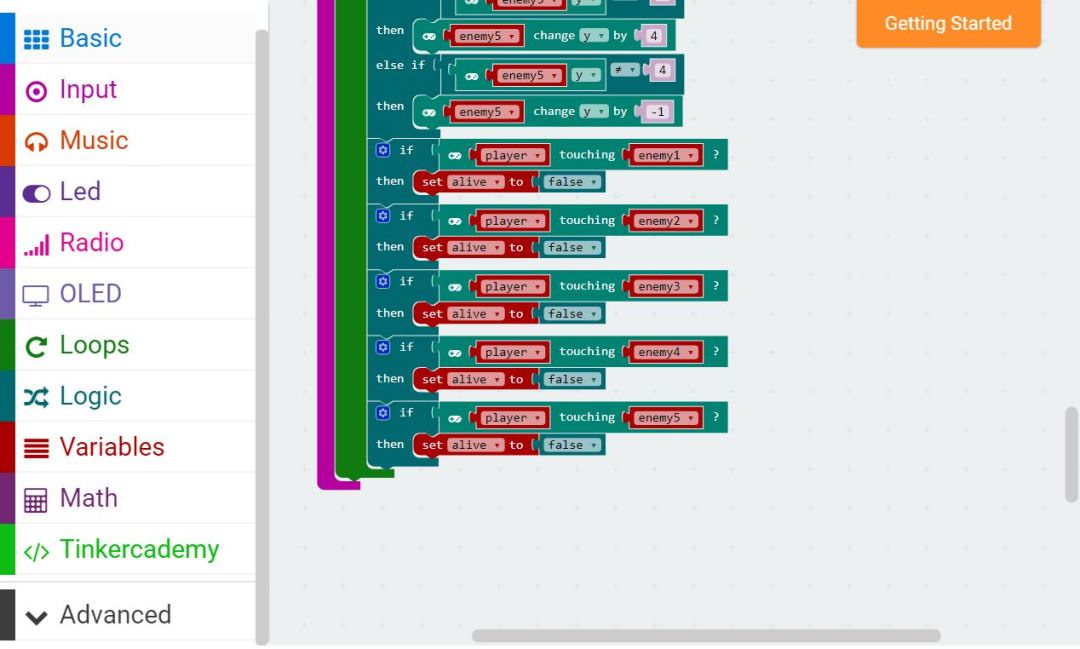
This bit codes for the behaviour of the projectiles when they are in motion already. They move up by 1 if they are in the middle three rows, and they return to the bottom row if they are already at the top row.
We also have to check if the sprites are touching the player so that we can know when the player is hit. If the player is hit, the variable “alive” is changed to “False”, The while loop will stop looping, and the game will stop too.
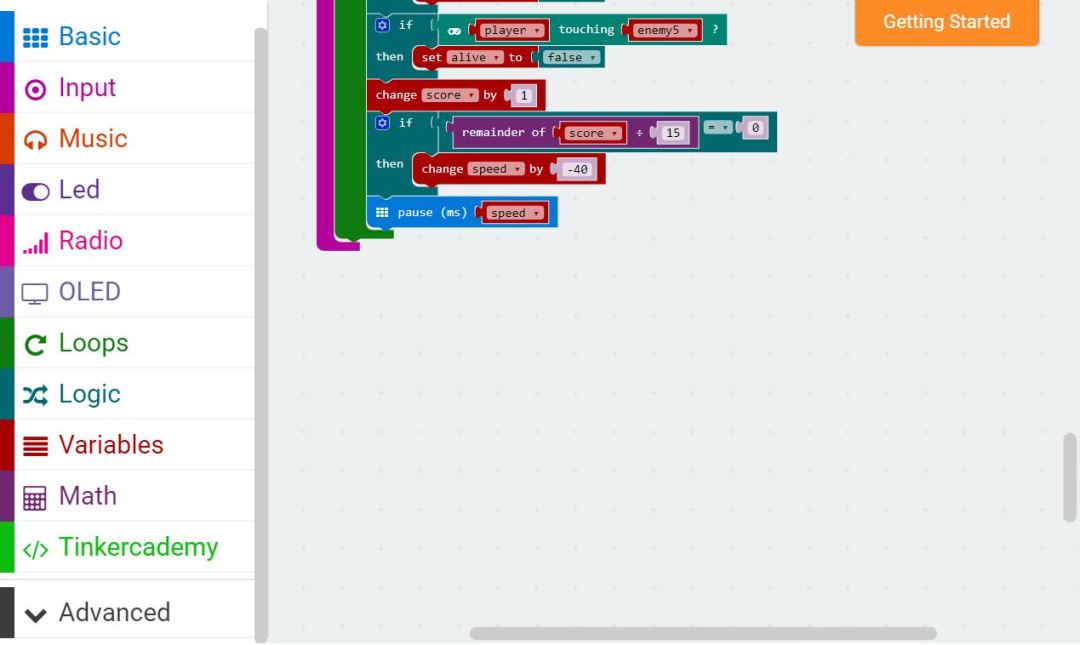
Finally, we will increase the score by 1 for every loop. For every 15 points gained, the variable “speed” will be decreased by 40, causing the projectiles to speed up. The pause controls said speed of the projectiles.
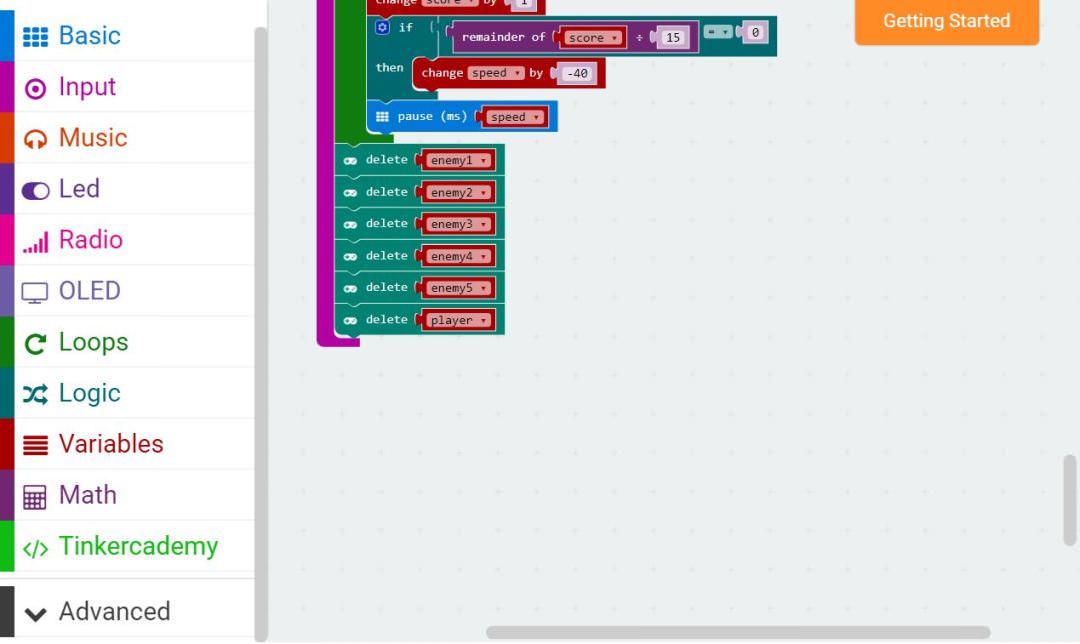
After the game is over, we must delete the sprites so that they do not clog up the LED screen.
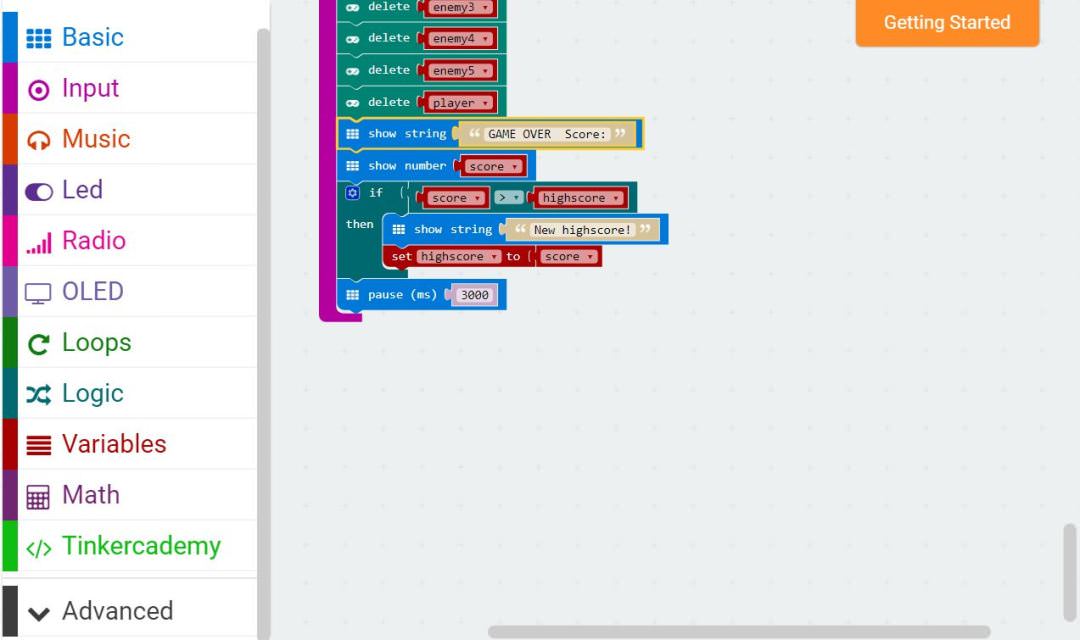
The game will display “Game Over” on the LED screen, followed by the score attained. If the score is higher than the current highscore, then the highscore will be replaced.
If you don’t want to type these code by yourself, you can download the whole program from the link below:
https://makecode.microbit.org/_i92YKmDhr9Tf
Or you can download from the page below:
Step 4 – Success!#
Voila! You have created your own mini video game console with your Micro:bit. Now go out there and show your friends who’s the real boss!