HC-SR04 Ultrasonic Module User Guide
January 11, 2019
Bluetooth Modem Video Tutorials
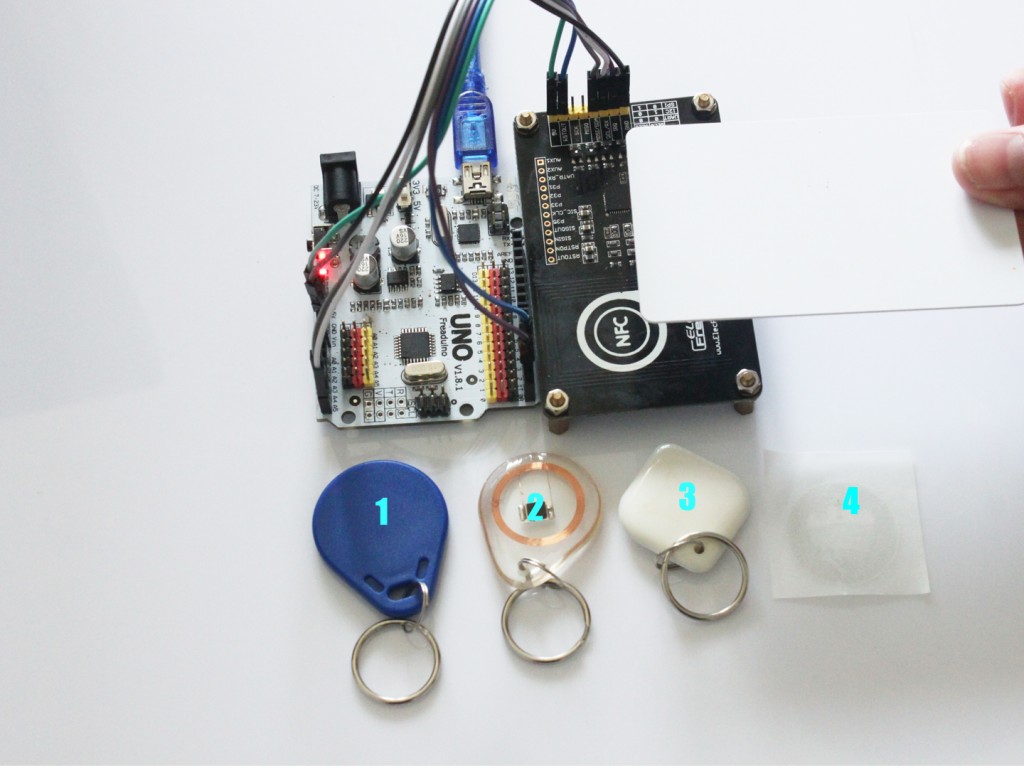
January 11, 2019Up to now, our NFC series released NFC Shield and NFC Module. In the practical operation, many friends emailed us to inquire about the using method, because they can not run the purchased NFC. During the process of making NFC video and NFC user-guide, we really feel that there are so many detailed points you need to pay attention to, or you would failin operation,therefore, let’s seriously take a look at the NFC Shiled/NFC Module video tutorial together.
NFC Shield/NFC Module Introduction
NFC Shield is a Near Field Communication interface for Arduino build around the popular NXP PN532 integrated circuit and SPI communication between Arduino and NFC Shield.. NFC is a short-distance radio technology that enables communication between devices that are held close together. RFID/NFC traces its roots in RFID technology and is an open platform technology standardized in ECMA-340 and ISO/IEC 18092. The NFC/RFID breakout base on PN532, which is the most popular NFC chip, and is what embedded in pretty much every phone or device that does NFC. It can pretty much do it all, such as read and write to tags and cards, communicate with phones (say for payment processing), and ‘act’ like a NFC tag. If you want to do any sort of embedded NFC work, this is the chip you’ll want to use!
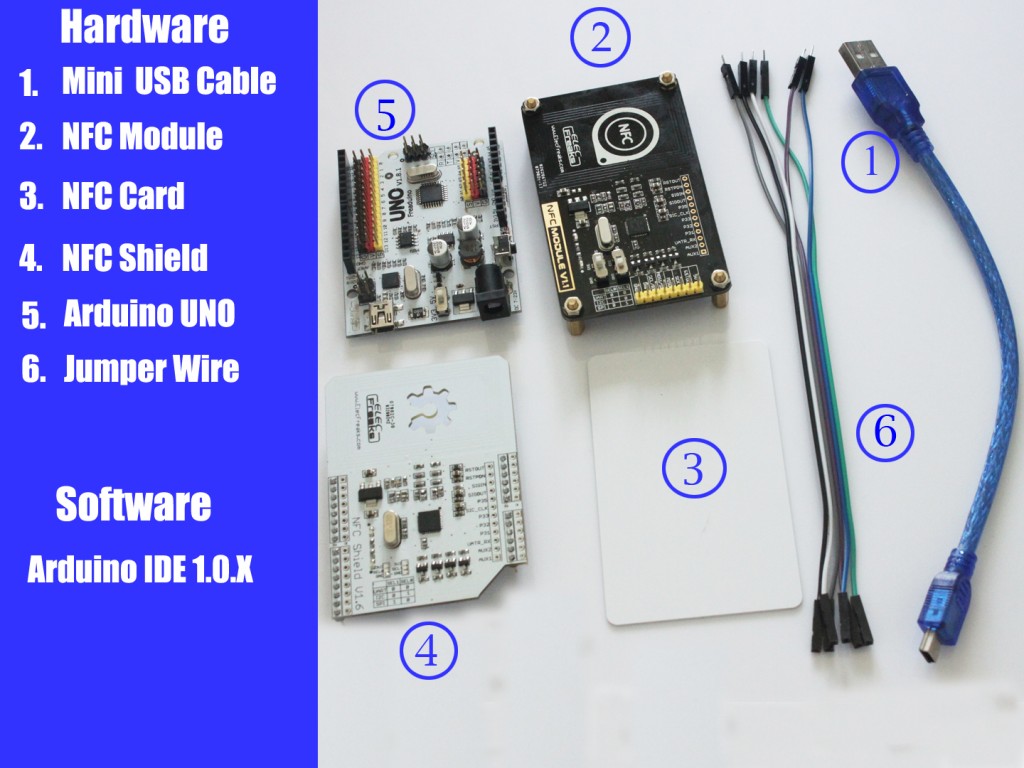
Hardware and Software Preparation
Part 1 Communication Between Arduino and NFC Shield
1. Set the Arduino UNO Switch in 5V power supply
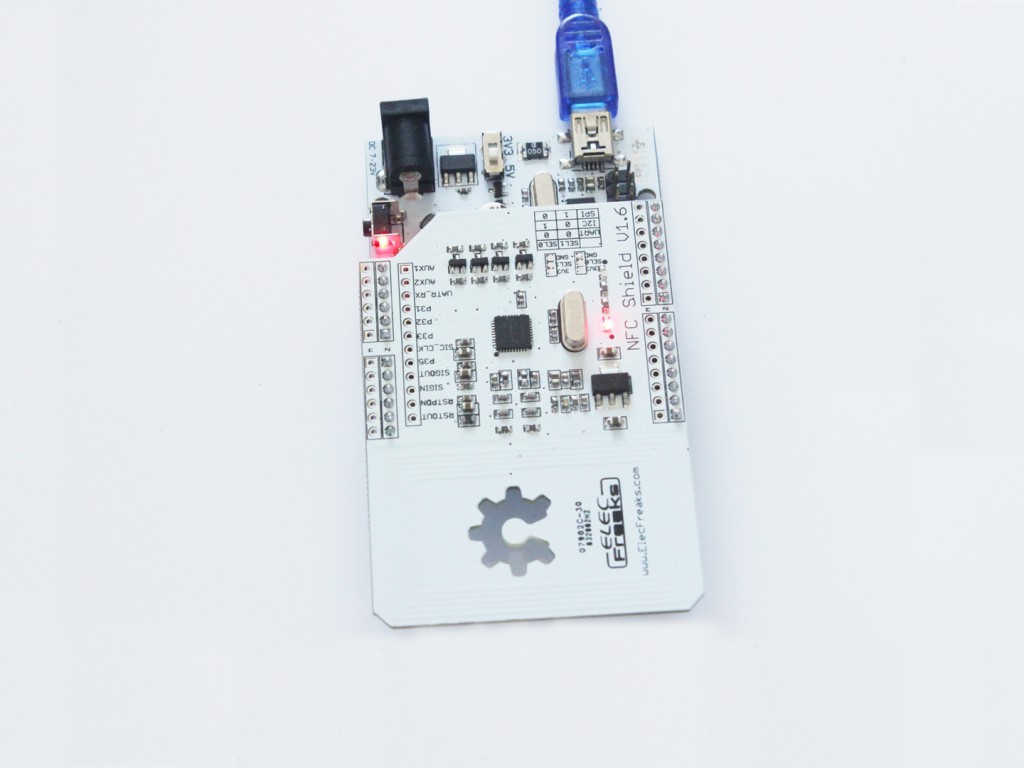
2. Assemble the Arduino UNO and NFC Shield, and then link to PC with USB Cable (we default the NFC Shield communicate in SPI Mode.)
3. Open Arduino IDE and choose the corresponding Board and Serial port
4. Click Examples / PN532_SPI / readAllMemoryBlocks ( if you do not have library of PN532_SPI, please Download Demo Code PN532_SPI and Put the file of PN532_SPI in the file of arduino -1.0.X / libraries )
5. Please Note: Arduino 1.0 users have to change the #include lines to #include in PN532.cpp and PN532.h.
6. Compiling sketch until done uploading appears
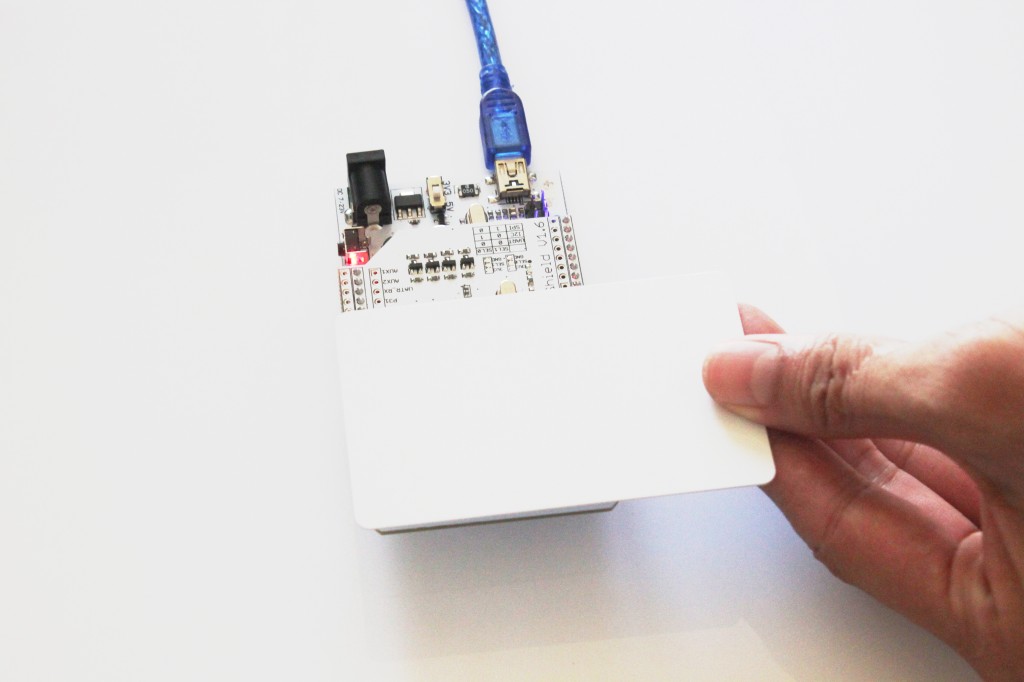
7. Place the NFC Card near the NFC Shield to perform reaction
8. Open Serial Monitor and set the BaudRate as 9600 9. All memory blocks from NFC Card would be read and displayed
Part 2 Communication Between Arduino and NFC ModuleThrough SPI
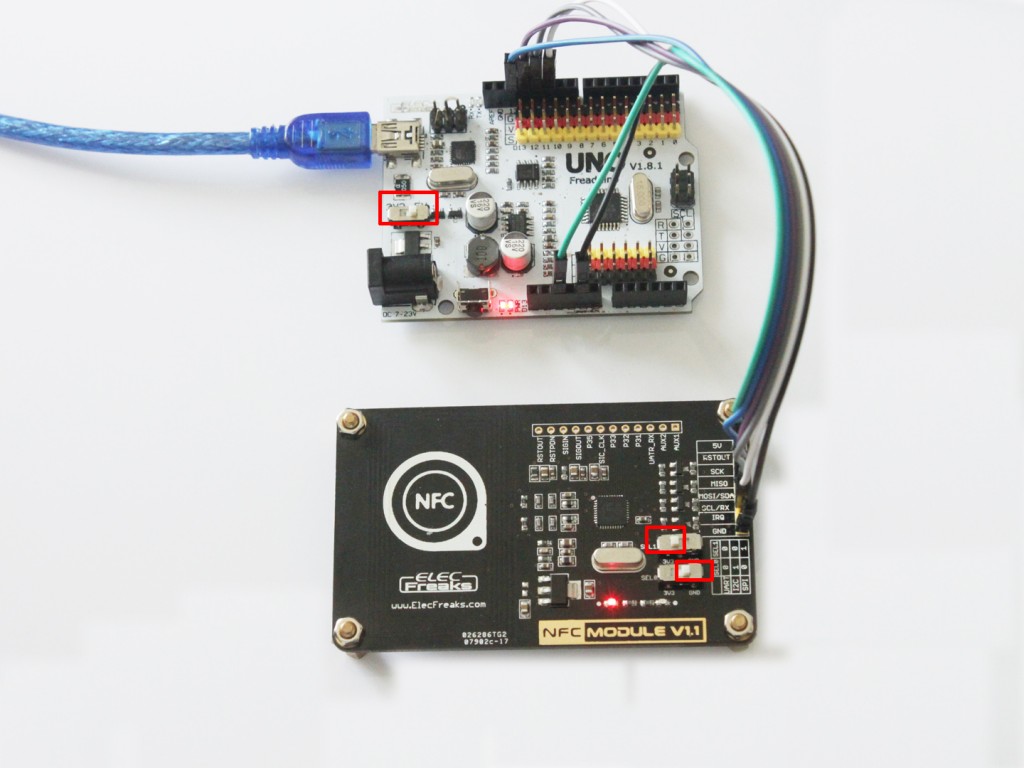
1. Set the Arduino Switch in 5V power supply.
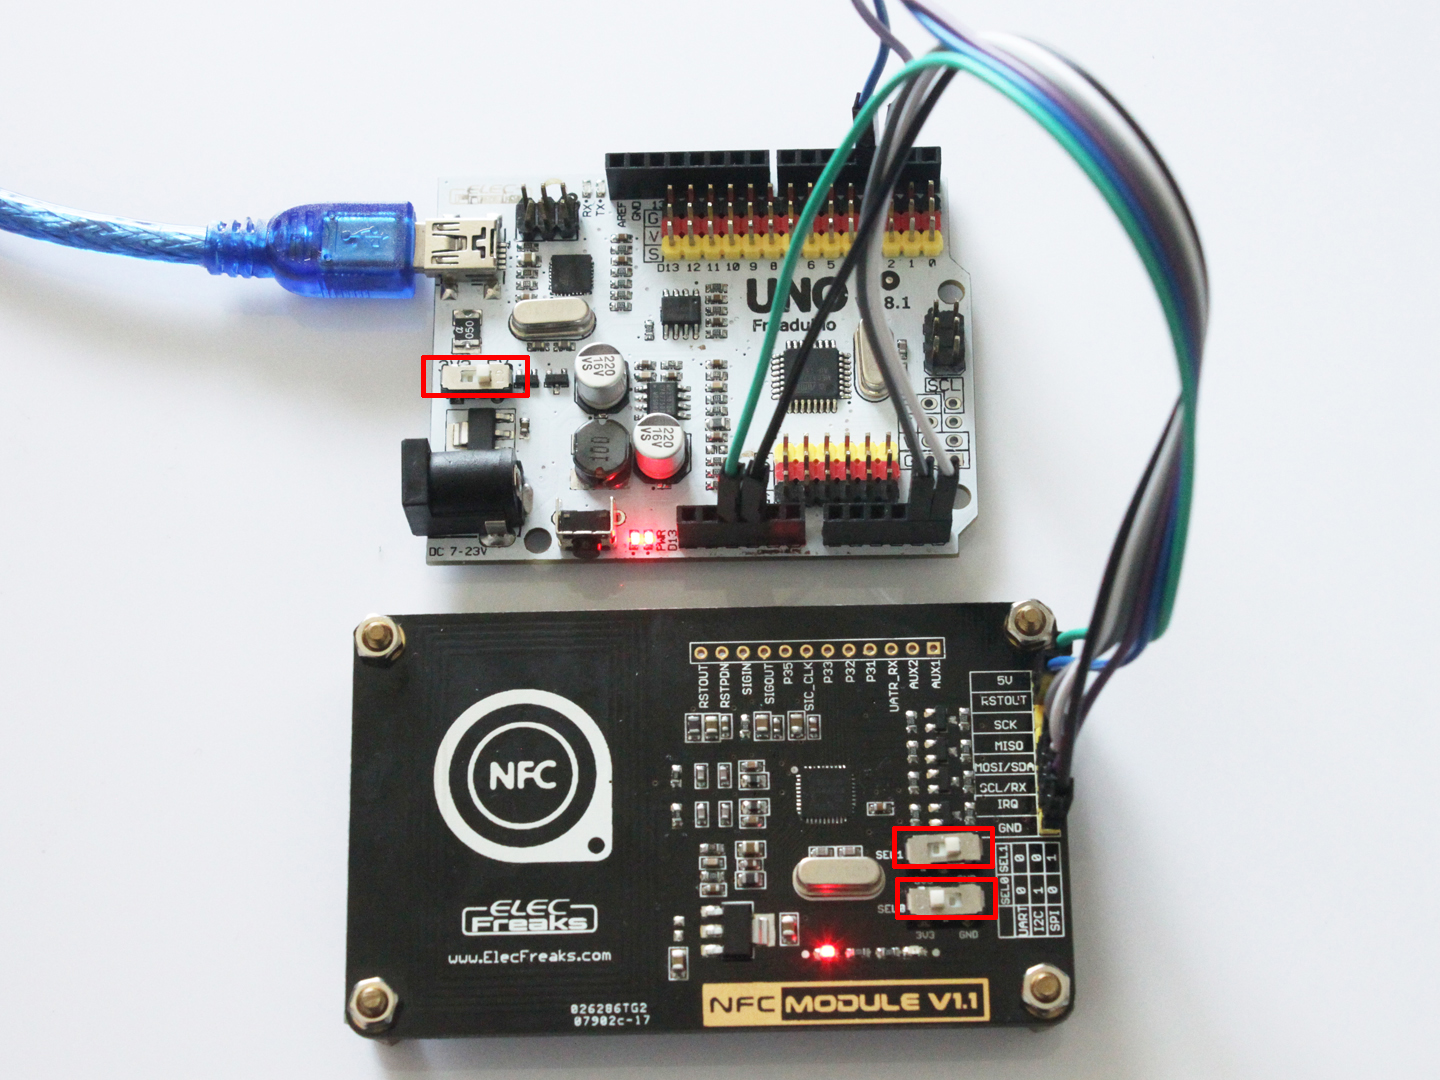
2. To enter SPI Mode, you need to set the SEL0 Switch in GND Side (for 0) and set the SEL1 Switch in 3V3 Side (for 1)
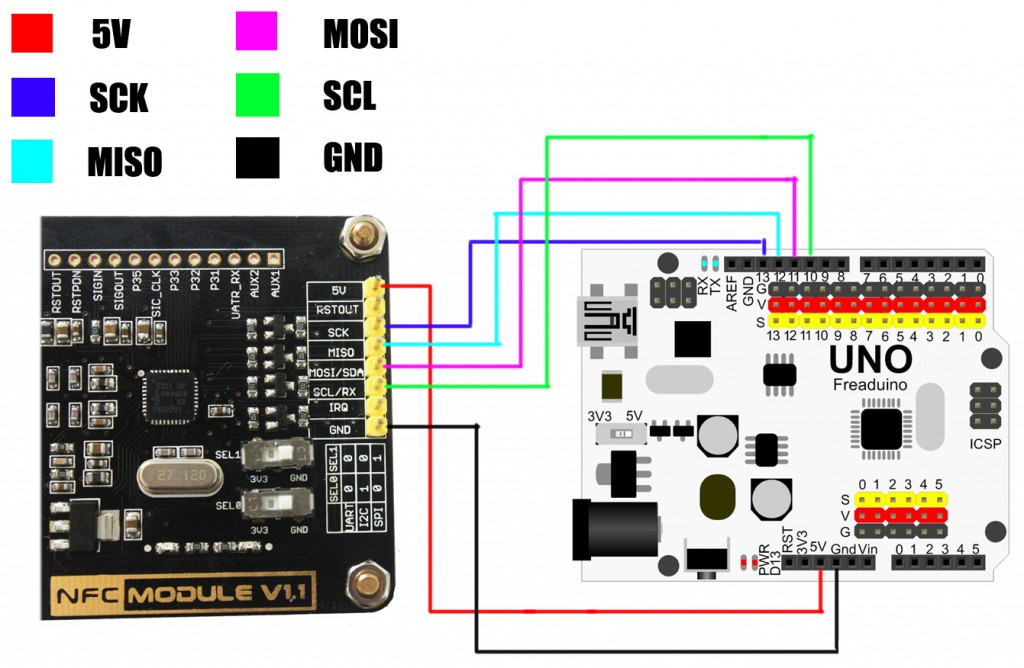
3. Assemble the Arduino UNO and NFC Module with Jumper Wire as below, and then link to PC
5V to 5V
SCK to D13
MISO to D12 MOSI to D11
SCL to D10
GND to GND
4. Open Arduino IDE1.0.X, and then click Examples, PN532_SPI, readAllMemoryBlocks
5. Compiling sketch until done uploading appears
6. Place the Card near the Module to do reaction
7. Open Serial Monitor and set the BaudRate as 9600
8. All memory blocks from NFC Card would be read and displayed
Part 3. Communication Between Arduino and NFC Module through IIC
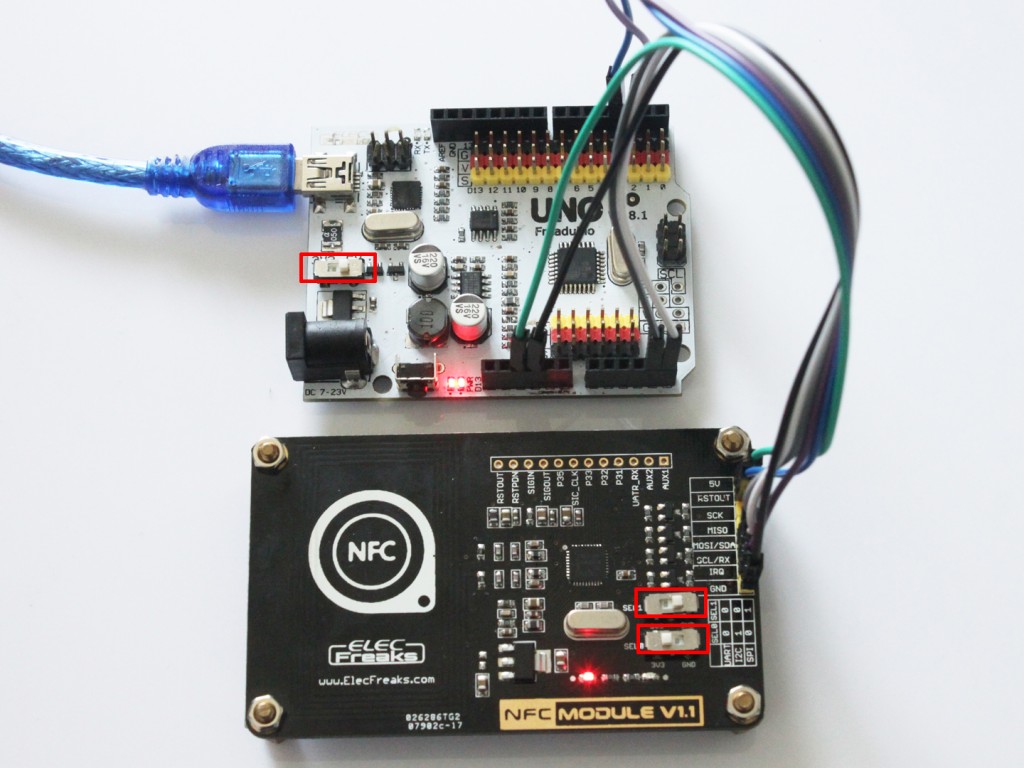
1. Set the Arduino Switch in 5V power supply.
2. To enter IIC Mode, you need to set the SEL0 Switch in 3V3Side (for 1) and set the SEL1 Switch in GND Side (for 0)
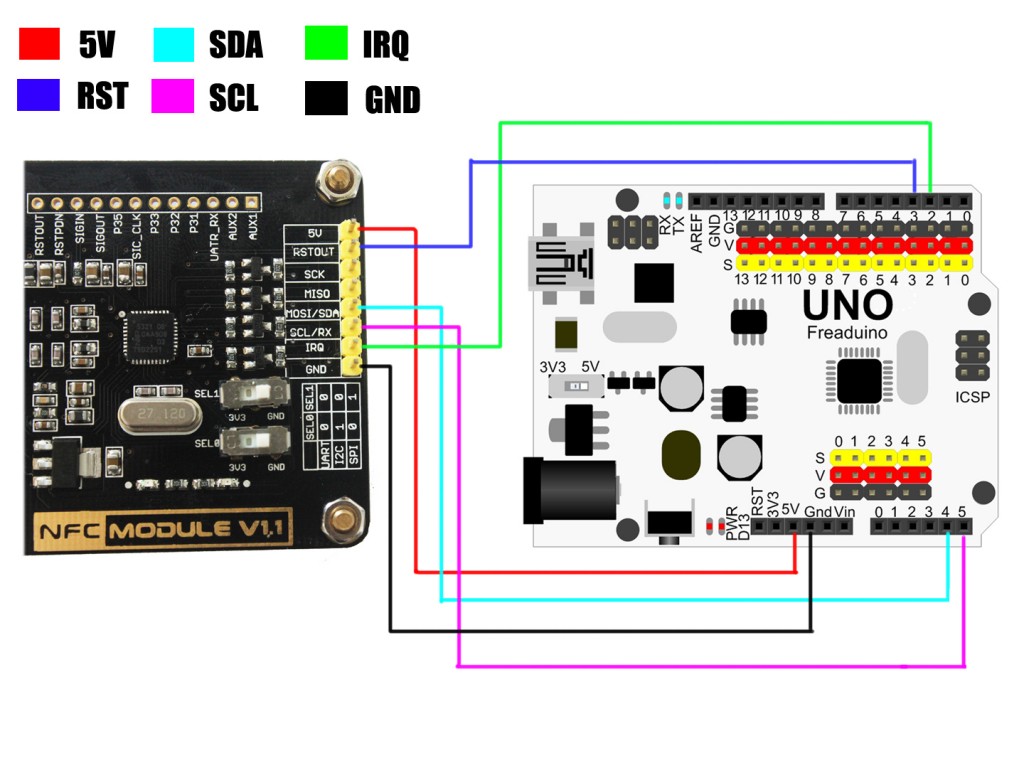
3. Assemble the Arduino UNO and NFC Module with Jumper Wire as below, and then link to PC
5V to 5V
RST to D3
SDA to A4 SCL to A5
IRQ to D2
GND to GND
4. Download IIC Demo
5. Change the file name from NFC_I2C-master into Adafruit_NFCShield_I2C, and then put in file of arduino-1.0.X / libraries
6. Click Examples / Adafruit_NFCShield_I2C/ iso14443a-uid and upload code.
7. Place the NFC Card near the NFC module to do reaction.
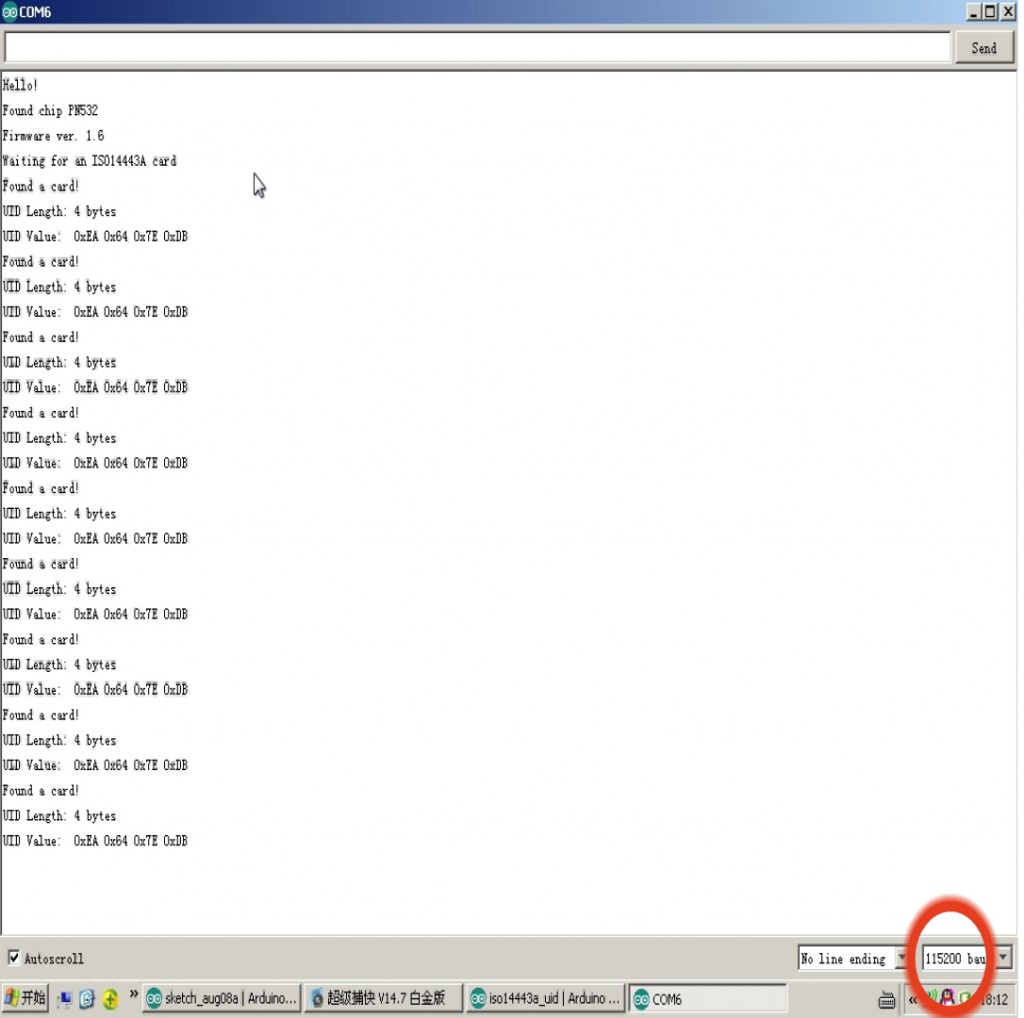
8. Open the Serial Monitor and set the BaudRate as 115200
9. The data from NFC Module would be displayed in the Serial Monitor


