🐰Happy Easter Day🐰Shop now with up to 30% off sitewide.
Menu


Introduction
Micro:bit has integrated multiple sensors including accelerometer. Today, we are going to use accelerometer to make an level device and display the inclination on NeoPixel ring in bar chart format.
Component List Hardware:
1 x Micro:bit Board
1 x Micro-B USB Cable
1 x Microbit Breadboard Adapter
1 x Transparent Breadboard – 83 * 55 mm
1 x 8 RGB Rainbow LED Ring
1 x Breadborad jumper wire 65pcs pack
Tips: If you want all components above, you may need Elecfreaks Micro:bit Starter Kit.
Software:
Micro:soft Makecode Online Editor
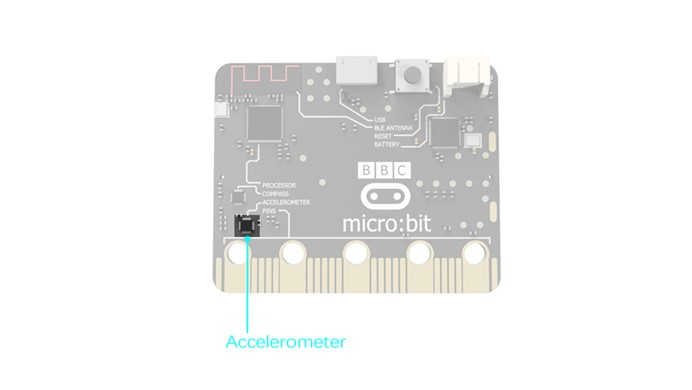
Major Component Accelerometer
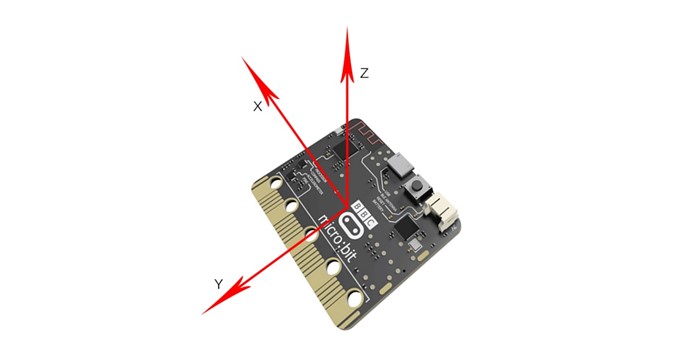
There is an accelerometer on your micro:bit which detects the speed change of micro:bit. It converts analog information into digital form that can be used in micro:bit programs. Output is in milli-g. The device will also detect a small number of standard actions, e.g. shake, tilt and free-fall.

The corresponding X, Y, Z axle direction of accelerometer are showed below:

Hardware Connection
Please complete hardware connection according to the picture below.

After connection, you will see:

Programming
Open Microsoft Makecode, write your code in the edit area. I would like to suggest you program by yourself first. Of course, you can see the whole program in the link below. Just click “Edit” on the right top corner of the interface to edit your program, then click “Download” on the right bottom corner to download your code into micro:bit.
Code Explanation
show bar graph Display the value with bar chart format just similar to plot bar graph. Acceleration Get the acceleration value (milli g-force) in one of three dimensions, or the combined force in all directions (x, y, and z).
Experiment Result
With the inclination of micro:bit, LED bead on 8 RGB Rainbow LED Ring gradually illuminated one by one. The bigger inclination angle, more LED bead will be illuminated.
Question
In this case, we have judged the inclination of one direction(X axle) only. If we want to test the inclination of a flat surface( say XY flat surface), then how to design circuit and program. We look forward to your comments and further discussions with us.
Relative Readings:
Start Your Micro:bit Programming Trip Micro:bit Experiment 01: LED Scroller —— Elecfreaks Micro:bit Starter Kit Course Micro:bit Experiment 02: Button —— Elecfreaks Mirco:bit Starter Kit Course Micro:bit Experiment 03: Trimpot —— Elecfreaks Mirco:bit Starter Kit Course Micro:bit Experiment 04: Photocell —— Elecfreaks Mirco:bit Starter Kit Course Micro:bit Experiment 05: RGB LED —— Elecfreaks Mirco:bit Starter Kit Course Micro:bit Experiment 06: Self-lock Switch —— Elecfreaks Mirco:bit Starter Kit Course Micro:bit Experiment 07:Temperature Sensor —— Elecfreaks Mirco: bit Starter Kit Course Micro:bit Experiment 08:Servo —— Elecfreaks Mirco: bit Starter Kit Course Micro:bit Experiment 09:Buzzer —— Elecfreaks Mirco: bit Starter Kit Course Micro:bit Experiment 10: Motor —— Elecfreaks Mirco: bit Starter Kit Course Micro:bit Experiment 11: Rainbow LED Ring —— Elecfreaks Mirco: bit Starter Kit Course
Stay up-to-date with our latest promotions,discounts,sales,and special offers.