SDM-IO Non-Blind Area Ultrasonic Distance Sensor Module
January 3, 2019nRF24L01 Module with PA and Longer Distances
January 3, 2019SG100x is a signal generator with FPGA technology, which is based on Direct Digital Synthesis(DDS). It can output the TTL with high stability and measure the frequency accurately. The output signal amplitude and DC bias can be adjusted. SG100x is very easy to use for studio, technicians and enthusiasts. Technical Data:

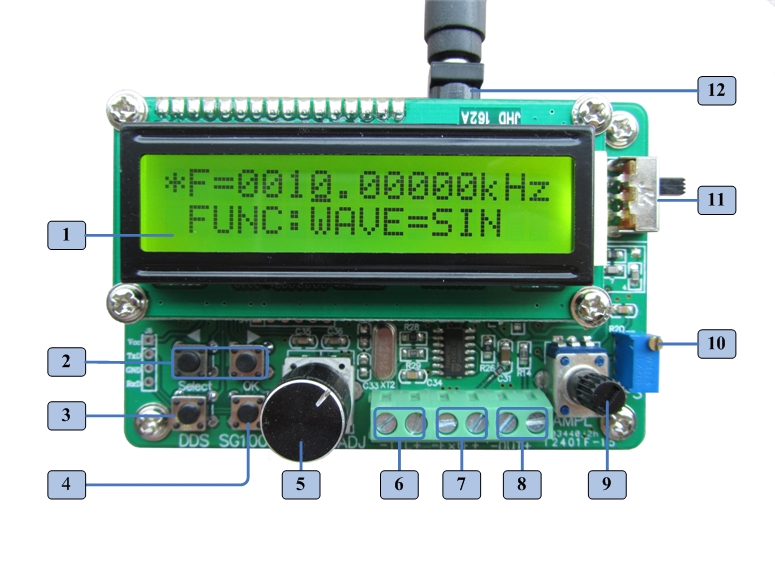
1. LCD
2. Right/Left:
- in Frequency Mode: move the cursor right or left
- in Func Mode: select the functions(WAVE, LOAD, SAVE, EXT.FREQ, COUNTER, DUTY)
3. Select: select the Frequency or Func
4. OK:
- in Frequency Mode: select the unit of frequency(Hz/kHz/MHz)
- in FUNC-WAVE: select waveform(sine wave, square wave, triangle wave, sawtooth wave)
- in FUNC-SAVE/LOAD: confirm Save or Load
5. Knob
6. TTL Output
7. Frequency Input to measure
8. Wave Output
9. Amplitude Adjust
10. Bias Adjust
11. Power Switch
12. DC 5V Input
Operating Guide
1. Obtain the Frequency to Output
a) Press “Select”
(3) to select the Frequency mode. The “*” on the left will show which mode is selected currently.
b) Press “OK”
(4) to select the unit you want.
c) Press “Right/Left”
(2) to move the cursor right or left to the number should be adjusted.
d) Turn “Knob”
(5) to obtain the right number.
2. Obtain the Wave to Output
a) Press “Select”
(3) to select the FUNC mode. The “*” on the left will show which mode is selected currently.
b) Press “Right/Left”
(2) and select “WAVE”.
c) Press “OK”
(4) to select the waveform: SINE wave, SQUARE wave(if you want to adjust the Duty Cycle from1% to 99%, please press “Right/Left”
(2) to “DUTY” and turn the “Knob”
(5)), TRIANGLE wave(DUTY=50%), SAWTOOTH wave(DUTY<50 or DUTY>50). 
 SAWTOOTH wave(DUTY>50%)
d) Output the wave from “Wave Output”
(8), and you can adjust the Output Amplitude by turning “Amplitude Adjust”
(9) knob.
e) To adjust the DC Bias, please turn “Bias Adjust”
(10) knob.
3. SAVE/LOAD Wave
a) Press “Select”
(3) to select the FUNC mode. The “*” on the left will show which mode is selected currently.
b) Press “Right/Left”
(2) and select “SAVE” or “LOAD”.


c) Turn “Knob”
(5) to select the No.(from 0 to 9) of the location you want to save to(or load from).
d) Press “OK”
(4) to confirm.
e) You will see “OK” in the lower right of the screen if it save/load successfully. PS: Default boot load is No.0
4. COUNTER
a) Press “Right/Left”
(2) and select “COUNTER” under FUNC mode.

b) Input the signal form “Frequency Input”
(7), then the screen will show the count.
c) Zero clearing by pressing “OK”
(4).
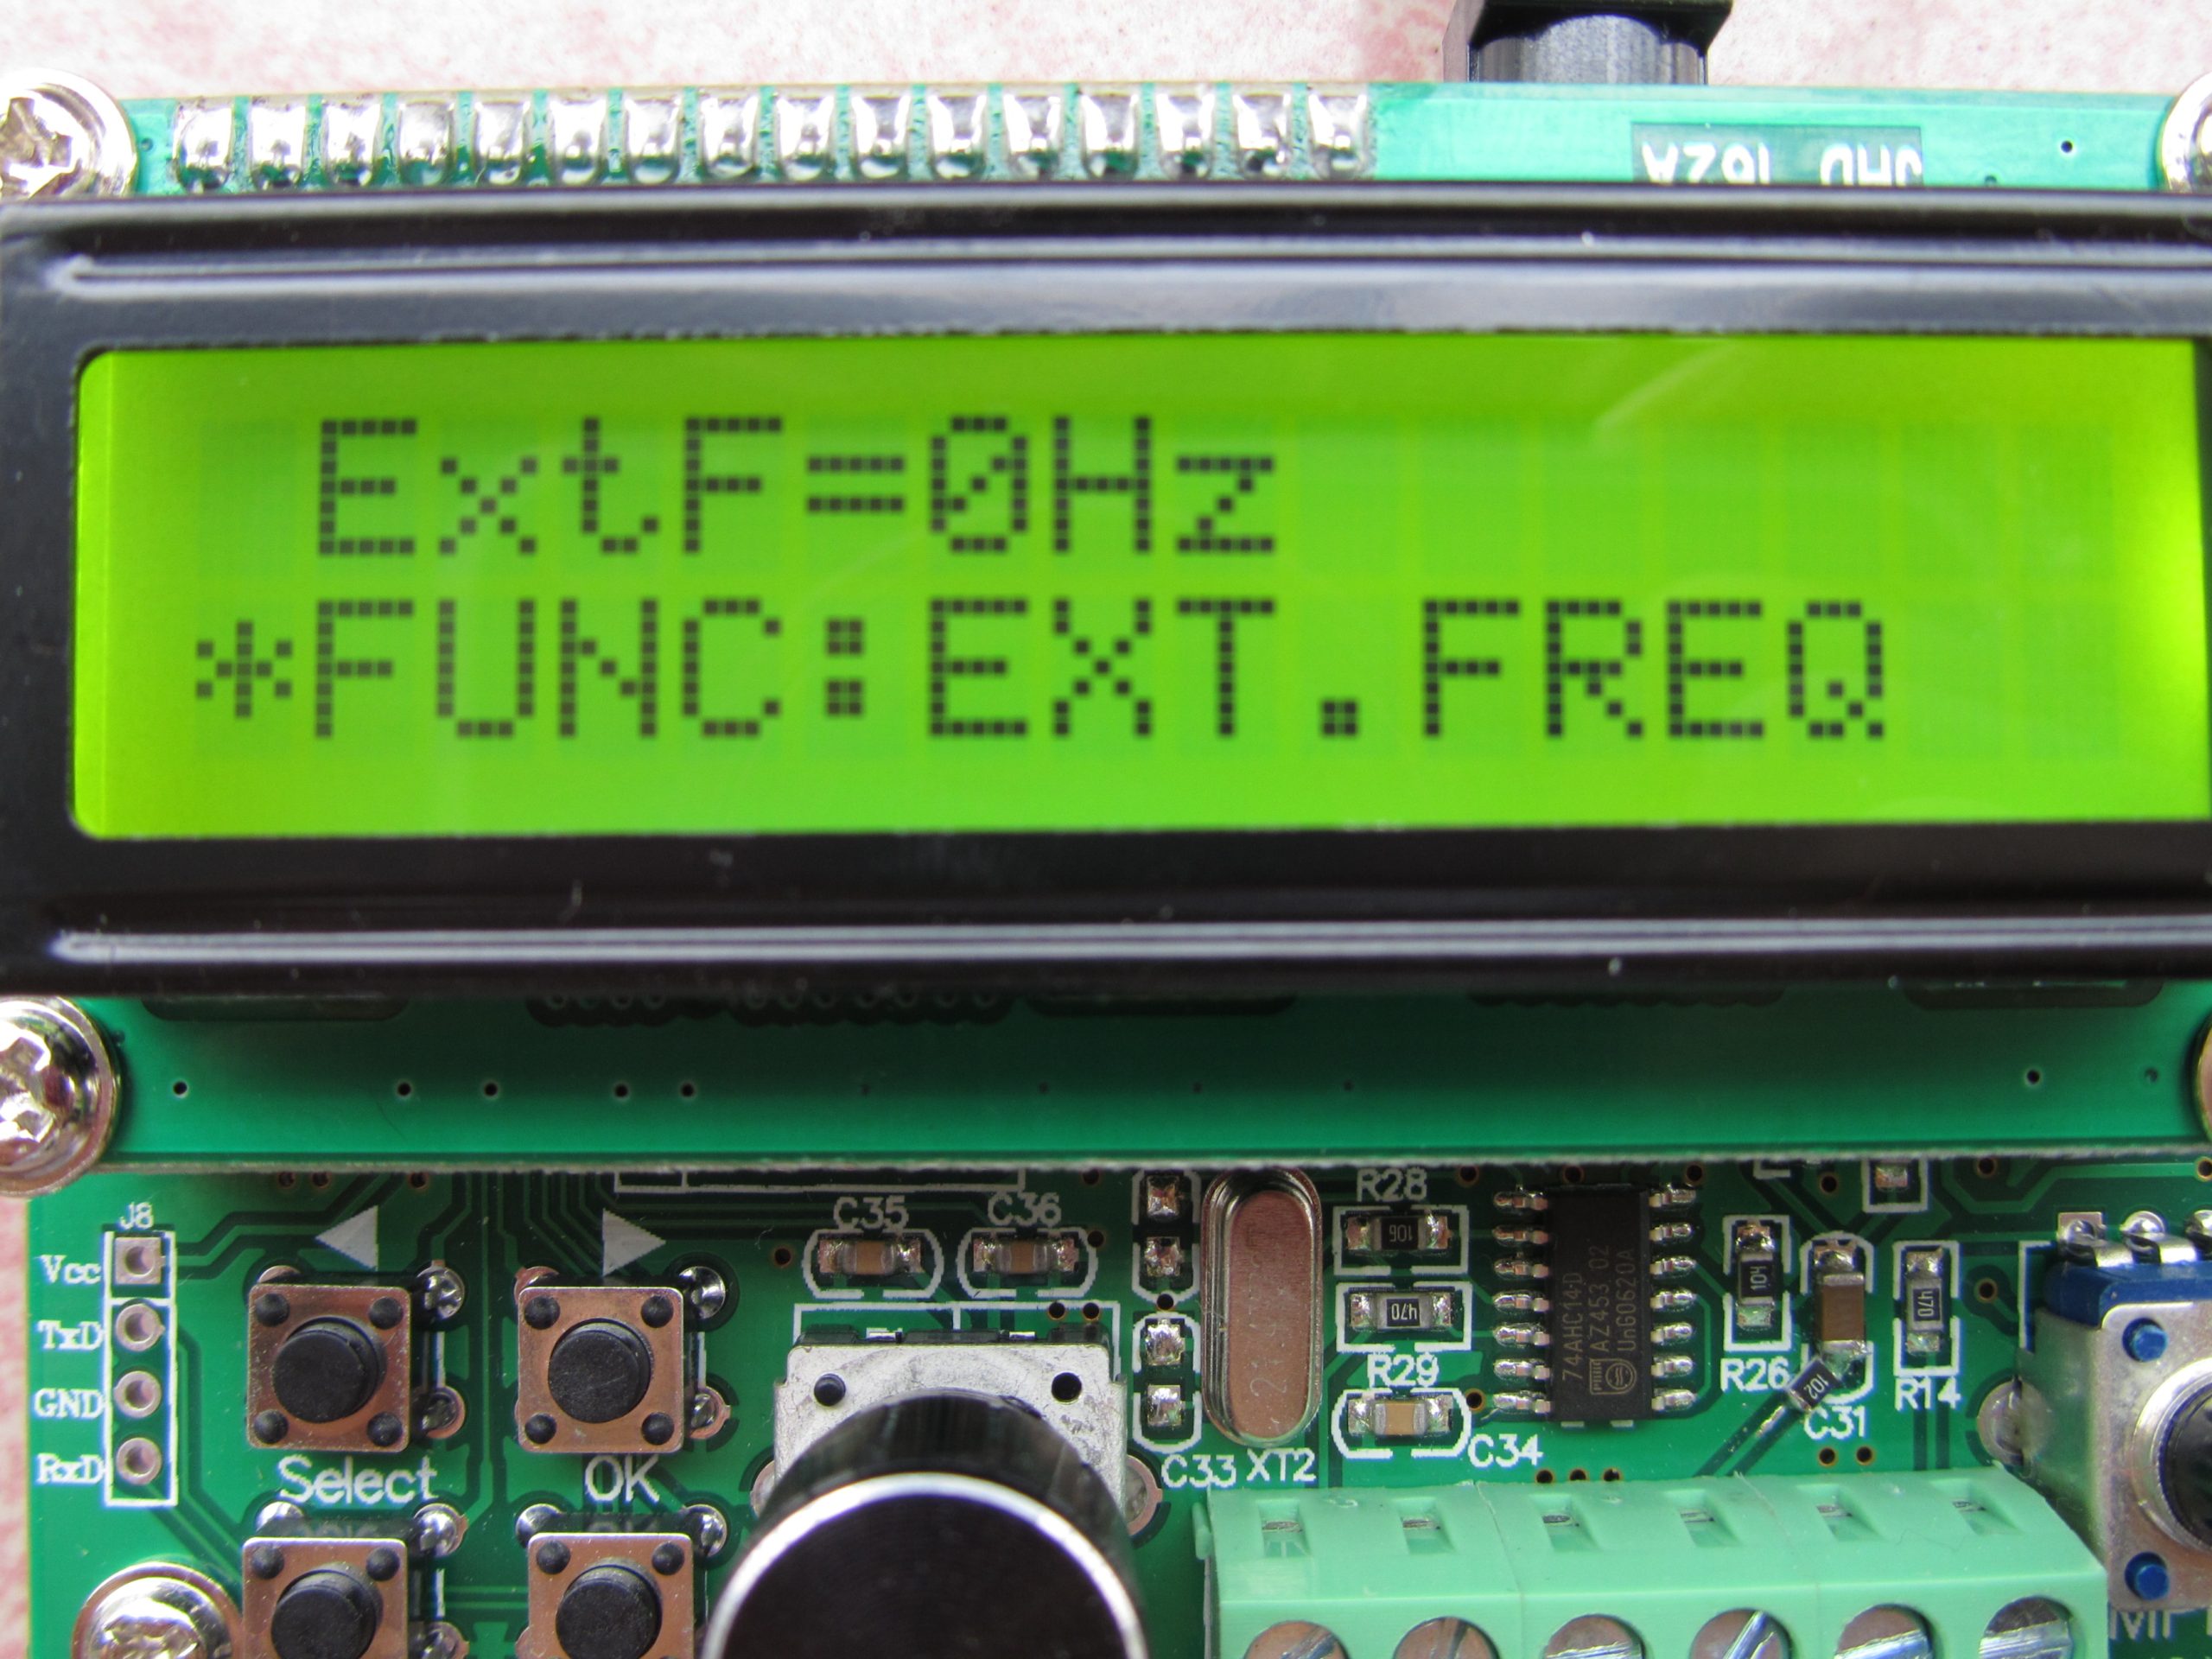
5. Frequency Measurement
a) Press “Right/Left”
(2) and select “EXT.FREQ” under FUNC mode.
b) Input the signal form “Frequency Input”
(7), then the screen will show the data.


