Raspberry Pi USB Webcam User guide
January 11, 2019
A Review WR Bridge By Portuguese
January 11, 2019Hi, everyone, in the past one month, we have released several Raspberry Pi series product, which attracted lots of people’s attention, therefore, we decided to make a series of Raspberry Pi User guide from our customers. Today, we will share with you the first of them, Raspberry pi 2 System Installation and Start , really hope which can be beneficial for you to understand and operate Raspberry Pi, especially for those starters. Preparation
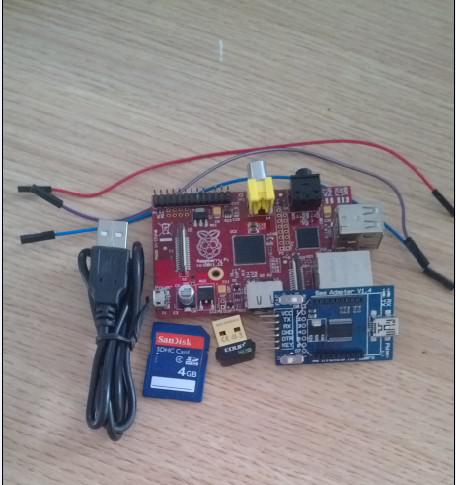
(1) Hardware Preparation Raspberry pi Mainboard 、PC、Bee Adapter、Wireless USB adapter、SD card、Mirco USB cable、Jumper Wire.
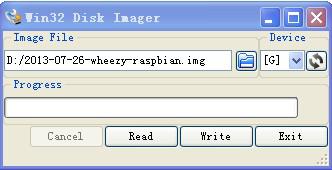
(2) Software Preparation Download the new edition of Raspbian operating system from http://www.raspberrypi.org/downloads ,and we use the wheezy edition for test, which was released in August 7th,2013. Download SD card Mirror Writing Tools Win32DiskImager???Install SecureCRT to PC 1.2 Download SD card Mirror Image Writing Tools Unpack the software downloaded by last step to get the file of xxx.img,and insert the SD card into the PC via Reader. Open the Win32DiskImager software,and the operation steps are presented as bellow
The above Image File represents xxx.img mirror image file’s path (remember that the storage path can not have Chinese), device indicates the SD card drive letter G . When everything is ready, you can click on the write button and wait for a few minutes, then the mirror image writing would finish. 1.3 Boot the system and configure it through the serial port
(1) Raspberry pi 2 GPIO Pin Definition
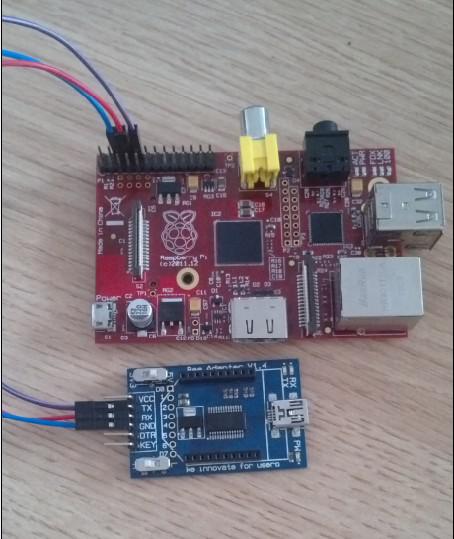
(2) Raspberry pi 2 and Bee Adapter Connection
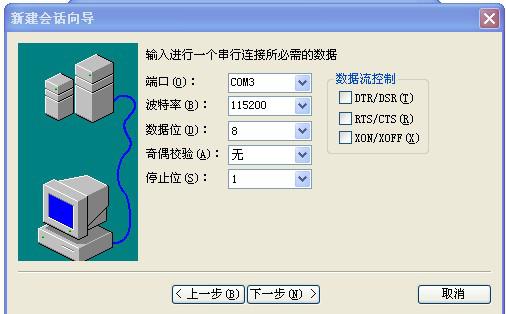
(3) Set SecureCRT Terminal Software
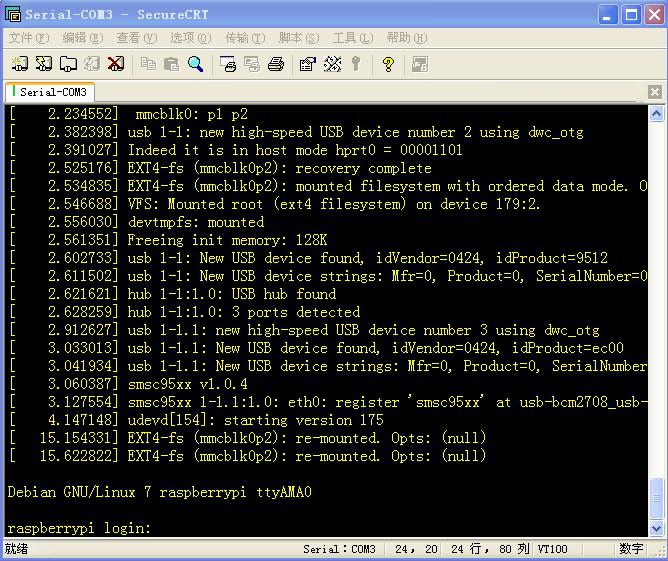
(4) Insert the SD card system to be charged If SecureCRT emerge the following screen, that represents the successful launch of raspberrypi
Type the system login user name pi, and type login password raspberry, then you can enter the system, if the user does not know the system’s initial login account, he can go to the official website to check it. We need to activate the root account, and the system default is to shield the root account, so we type sudo passwd root in the Terminal, if the following interface appears, we can set the password for the root account
After set up the password, you can switch to the root account, and enter
su root command in the terminal to get into the root account. Next let’s explain the wireless USB adapter configuration.


